How to calculate MIG welding cost: define the weld scope first, then price each cost bucket on its own. Work out the deposited weld metal and filler-wire use, estimate arc-on time from a tested travel speed or deposition rate, convert that into paid labor, and add shielding gas, equipment, power, overhead, contingency and profit.
Keep markup and target gross margin separate because they use different formulas. This guide covers MIG/GMAW only; for a broader multi-process method, see our general welding cost calculation guide.
Quick Answer
- Define the job from the drawing or weld schedule: joint type, weld size, length, material, position, access, quantity, finish, and inspection requirements.
- Calculate deposited weld metal from weld cross-sectional area × total weld length, then convert volume to mass using the correct material density.
- Estimate filler-wire use from deposited weld mass and a documented or measured deposition efficiency.
- Calculate arc-on time from tested travel speed or deposition rate, then add or calculate non-arc labor without double-counting it.
- Calculate shielding-gas cost from flow rate × actual gas-on time × delivered gas unit cost.
- Add consumables, equipment, power, outside services, overhead, contingency, and then apply your chosen markup or target-margin formula.
How to Calculate MIG Welding Cost: The Formula
A defensible MIG welding estimate keeps cost, overhead, risk, and selling-price logic visible instead of hiding everything inside one hourly rate.
Estimated job cost = base material + loaded labor + filler wire + shielding gas + small consumables + equipment/power + outside services + allocated overhead + contingency
Quoted price using markup = estimated job cost × (1 + markup rate)
Quoted price for a target gross margin = estimated job cost ÷ (1 − target gross-margin rate)
Markup and gross margin are not the same. Use the formula that matches the way your business actually prices work, and do not add overhead twice if your shop rate already includes it.
| Cost input | Calculation basis |
|---|---|
| Base material | Purchased quantity × current delivered unit cost |
| Deposited weld metal | Weld cross-sectional area × weld length × material density |
| Filler wire | Deposited weld mass ÷ documented or measured deposition efficiency |
| Arc-on time | Weld length ÷ tested travel speed, or deposited weld mass ÷ tested deposition rate |
| Labor | Total paid job hours × loaded labor rate |
| Shielding gas | Flow rate × total gas-on time × delivered gas unit cost |
| Equipment and power | Documented machine-hour allocation + measured/estimated electricity cost |
| Overhead | Company-approved allocation method |
| Contingency | Project-specific allowance for defined uncertainty |
| Selling price | Apply either markup or target gross-margin formula |
Understanding Welding Cost Components
When you calculate MIG welding costs, separate the estimate into traceable cost buckets. Typical buckets include base material when you supply it, direct or loaded labor, filler wire, shielding gas, small consumables, equipment and power, outside services, overhead, contingency, and profit.
Labor should reflect every paid task required by the scope, not only arc-on time. Depending on the job, that can include drawing review, material handling, cleaning, fit-up, tacking, setup, fixturing, welding, repositioning, interpass work, grinding, dimensional checks, inspection, finishing, packing, and cleanup.
Do not count an expense twice. If your shop billing rate already includes labor burden, equipment, overhead, and profit, do not add the same items again as separate percentages. For standards and procedure requirements, use the American Welding Society standards resources.
Step 1: Define the Scope of Work and Weld Geometry
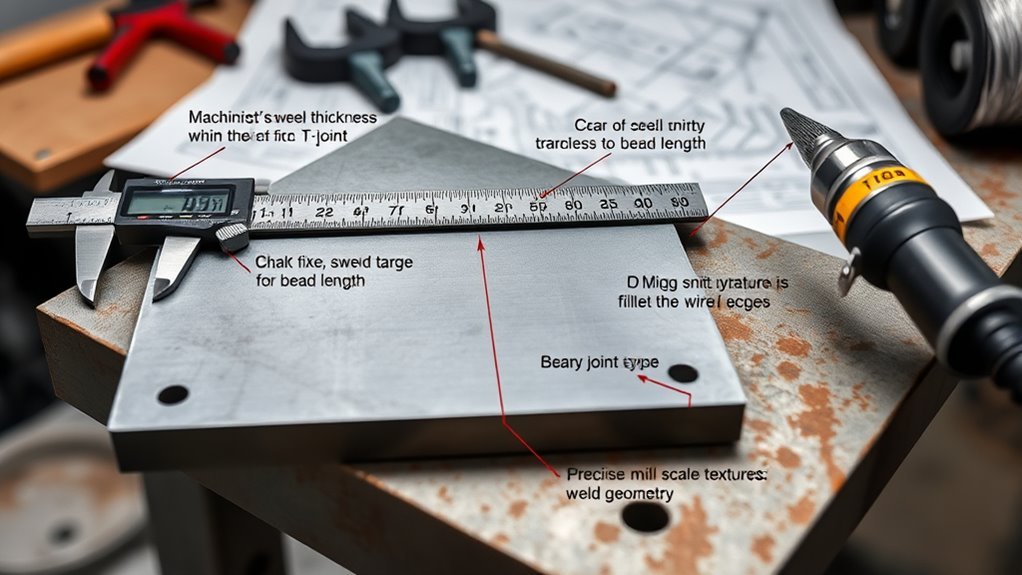
Start by listing every part and weld. Record the joint type, weld size, total length, number of joints, material, thickness, position, number of sides, edge preparation, and whether each weld is continuous or intermittent.
Then record requirements that affect time but are easy to miss during bidding: cleaning, fit-up, tacking, preheat or interpass controls when specified, fixturing, difficult access, distortion control, grinding, dimensional checks, inspection, documentation, and finishing.
The goal is to turn the drawing into a weld schedule that another estimator can audit.
Parts and Joint Types
Joint geometry determines weld volume, pass count, access, and much of the labor requirement. Identify each component’s joint type, such as butt, lap, corner, edge, or T-joint, and record the specified weld dimensions rather than estimating them from plate thickness alone.
For groove welds, also record the groove angle, root opening, root face, backing, and whether back-gouging or welding from both sides is required. For fillet welds, record the specified leg or throat dimension and total length.
| Item | Key data |
|---|---|
| Joint type | Butt / Lap / Corner / Edge / T-joint |
| Thickness | Actual drawing dimension in mm or in |
| Shape | Plate, tube, pipe, channel, or fabricated section |
| Access | Single-side / Double-side / Restricted |
| Edge prep | None / Bevel / Groove details from drawing or WPS |
Use these inputs to determine the actual weld cross-section, required passes, filler volume, and labor method.
Weld Length and Count
Measure and sum the total length of every weld. Keep different weld sizes and joint types on separate rows because one foot of a small fillet does not require the same filler or arc time as one foot of a larger groove weld.
Use tape measurements, drawing dimensions, CAD takeoffs, or a weld schedule. Record intermittent weld pitch and length, starts and stops, both sides of a joint when required, and the number of repeated parts.
For a simple equal-leg fillet weld, a planning approximation for the theoretical cross-sectional area is:
Fillet area ≈ leg size² ÷ 2
Then:
Weld volume = weld cross-sectional area × total weld length
Deposited weld mass = weld volume × material density
Actual bead profile, penetration, reinforcement, joint gaps, multi-pass sequencing, and procedure requirements can change the required weld-metal volume. Use the drawing, approved procedure, CAD model, or verified shop data when those details matter.
Tolerances and Access
After documenting weld geometry, identify tolerance and access conditions that change handling or rework risk. Tight dimensional requirements can add fixture setup, sequence planning, interim measurement, controlled cooling, straightening, or machining.
Access also affects productivity. A long flat weld on a positioner is not equivalent to the same weld length inside a restricted assembly.
- Record the controlling drawing dimension and tolerance for each critical feature.
- Classify access and welding position for each joint.
- Identify fixtures, rotation, cranes, helpers, or special handling needed.
- Use completed jobs with comparable geometry to estimate the resulting labor time.
Step 2: Select the MIG Process and Consumables

For MIG/GMAW estimating, the selected transfer mode, electrode classification and diameter, shielding gas, polarity, wire-feed speed, voltage, welding position, and procedure determine productivity and consumable use.
Do not select transfer mode from material thickness alone. Use the approved WPS where one applies, manufacturer procedure data, or a representative production trial. The Federal Highway Administration’s Bridge Welding Reference Manual provides detailed GMAW transfer-mode, electrode, and shielding-gas background.
Choose the MIG Mode
Short-circuit, globular, spray, and pulsed-spray transfer have different operating windows and productivity characteristics. Short-circuit transfer uses relatively low arc energy and is useful where lower heat input and positional capability are needed. Conventional spray transfer requires the electrode/current/gas combination to exceed its transition-current condition and, for steel, requires an argon-rich shielding gas. Its fluid puddle normally limits conventional spray transfer to suitable positions. Pulsed spray cycles between peak and background current to reduce average current while retaining controlled droplet transfer.
For estimating, record the transfer mode actually intended for the job instead of assigning one from a universal thickness rule.
- Start with the WPS or proven shop procedure.
- Record wire classification and diameter.
- Record the intended transfer mode, wire-feed speed, voltage, travel speed, and position.
- Use a production trial when procedure data do not reflect the real joint, access, or fixture.
Select Filler Wire
Select the filler classification and diameter that match the base material, required properties, procedure, equipment, and joint. Do not assume one wire chemistry is appropriate for every steel, stainless, or aluminum job.
For cost estimation, the cleanest filler calculation begins with deposited weld mass:
Purchased wire mass = deposited weld mass ÷ deposition efficiency
Use a deposition-efficiency value supported by the selected consumable, procedure data, or your own measured production records rather than a universal assumption.
If you need to calculate solid-wire mass directly from wire-feed speed, use the wire’s cross-sectional area and density:
Wire area = π × wire diameter² ÷ 4
Wire mass per unit time = wire-feed speed × wire area × material density
Keep all units consistent. A wire-feed speed multiplied only by wire diameter is not a valid mass-flow calculation.
Flux-cored arc welding should be costed as its own process. Do not add a generic “wire-to-flux ratio” to solid-wire MIG costs. Use the actual FCAW wire price, deposition efficiency, shielding requirement, cleanup time, and procedure productivity when comparing it with GMAW.
Pick Shielding Gas
Choose shielding gas from the base material, transfer mode, electrode, WPS, and equipment guidance. Gas choice affects arc behavior, transfer mode, penetration profile, spatter, bead appearance, cleanup, and total cost.
For carbon-steel GMAW, argon/CO2 blends and straight CO2 are commonly used depending on the intended transfer mode and procedure. Conventional spray transfer on steel requires an argon-rich mixture; straight CO2 does not support axial spray transfer. Other materials and processes can require different gases.
Do not estimate gas cost from cylinder price alone. Convert the supplier invoice into a usable cost per cubic foot or litre and include rental, delivery, exchange, or handling charges when they apply. For current supplier-price examples and cylinder-cost logic, see our MIG welding gas cost guide.
Gas volume = flow rate × total gas-on time
Gas cost = gas volume × delivered gas unit cost
Gas-on time can exceed arc-on time when the procedure or equipment uses preflow, postflow, test flow, or other gas-consuming periods. Use the actual regulator/flowmeter setting and procedure instead of one universal CFH or L/min assumption.
Step 3: Calculate Labor Time and Travel Speed
Arc-on time is only one part of welding labor. Start with a tested travel speed or deposition rate that represents the actual wire, transfer mode, weld size, position, and joint.
Arc-on time = total weld length ÷ tested travel speed
Alternatively:
Arc-on time = deposited weld mass ÷ tested deposition rate
Then convert arc time to paid labor using one consistent method.
Method 1 — task-by-task: Add drawing review, material handling, preparation, fit-up, tacking, fixture setup, arc time, repositioning, interpass work, cleaning, inspection, finishing, and cleanup.
Method 2 — calibrated operating factor:
Total welding-operation time = arc-on time ÷ operating factor
The operating factor should come from comparable completed work or measured shop data. If the operating-factor method already includes normal setup, handling, cleaning, and repositioning, do not add those same minutes again.
After each job, compare estimated labor hours with actual labor hours. The variance is more useful for future bids than a universal minutes-per-joint allowance.
Step 4: Estimate Material, Gas, and Wire Costs

Separate base material, deposited weld metal, filler wire, shielding gas, and small consumables. These quantities come from different inputs and should not be mixed together.
- Base material: When you supply it, price the purchased plate, tube, pipe, fittings, or fabricated parts from the bill of materials or cut plan, including applicable freight and expected cutting loss.
- Deposited weld metal: Calculate weld cross-sectional area × total weld length × material density.
- Filler wire: Divide deposited weld mass by the documented or measured deposition efficiency, then multiply purchased wire mass by its current delivered unit cost.
- Shielding gas: Multiply actual flow rate by total gas-on time and then by the delivered unit gas cost.
- Small consumables: Add contact tips, nozzles, liners, anti-spatter material, abrasives, brushes, solvents, PPE allocation, and other meaningful job-specific items using your shop’s documented consumption method.
Do not use weld volume to calculate the quantity of base plate or tube being purchased. Base-metal quantity comes from the part design and material takeoff; weld volume is used to estimate deposited filler metal.
Step 5: Add Equipment, Overhead, and Profit
After labor and direct consumables are calculated, add the remaining job costs using a documented method. Equipment can be allocated by machine hour, rental period, or another internal cost driver. Power should be based on measured or defensibly estimated electrical use rather than confusing a machine’s thermal duty-cycle rating with the percentage of paid labor time spent welding.
Overhead can include rent, supervision, administration, insurance, software, calibration, utilities, and other indirect business expenses. Use the company’s established allocation method and check whether any of those costs are already included in the loaded labor or shop rate.
Contingency is different from profit. Use contingency only for identified uncertainty, and base it on project risk or historical variance rather than one universal percentage.
| Category | Estimator entry |
|---|---|
| Direct material | Purchased quantity × current delivered cost |
| Loaded labor | Total paid hours × loaded labor rate |
| Filler and gas | Calculated consumption × current delivered unit rate |
| Equipment and power | Documented machine/power allocation |
| Outside services | Current quotation for inspection, machining, coating, heat treatment, transport, or other required work |
| Allocated overhead | Company-approved allocation basis |
| Contingency | Documented allowance for identified uncertainty |
| Price with markup | Cost × (1 + markup rate) |
| Price for target gross margin | Cost ÷ (1 − target gross-margin rate) |
State quote exclusions and validity clearly. Taxes, freight, field travel, certification, NDT, machining, coating, customer changes, rush work, or replacement of customer-supplied material should be included or excluded explicitly rather than assumed.
Common Mistakes to Avoid in MIG Welding Cost Estimation
The most common costing mistake is treating arc-on time as total labor. Fit-up, tacking, setup, repositioning, cleaning, inspection, and finishing can consume more paid time than the arc itself on short or complex jobs.
Another mistake is applying universal travel speeds, gas flows, deposition rates, rework percentages, or minutes-per-joint numbers to every job. Use the actual procedure, production trial, or historical shop record whenever possible.
- Do not calculate wire mass as wire-feed speed × diameter.
- Do not treat solid-wire GMAW and flux-cored arc welding as the same consumable model.
- Do not calculate base-metal purchase quantity from weld volume.
- Do not count overhead twice when it is already built into the shop rate.
- Do not confuse markup with target gross margin.
- Do not use old gas, wire, material, freight, or subcontract prices without checking quote validity.
- Do not add an arbitrary rework percentage when actual historical rework data are available.
Tools and Resources for MIG Welding Cost Calculation
A spreadsheet is usually enough for a repeatable MIG cost model. Give each row an input, unit, formula, source, and revision date so another person can audit the estimate.
CAD or drawing takeoffs can improve weld-length and geometry accuracy. Supplier productivity tools and machine data can help establish starting parameters, but production trials and completed-job records are more useful when your real access, fixtures, procedure, or operator cycle differs from a generic calculator.
After completing each job, compare at least these items:
| Metric | Estimate review |
|---|---|
| Labor hours | Estimated vs actual |
| Filler wire | Estimated vs actual weight used |
| Shielding gas | Estimated vs actual cylinder or metered use |
| Rework / finishing | Estimated vs actual labor and consumables |
Use the variance to update future operating factors, setup allowances, wire efficiency, gas loss assumptions, and quote contingency.
Frequently Asked Questions
Can MIG Welding Costs Be Reduced by Switching to Flux-Cored Wire?
Sometimes, but not automatically. Switching from solid-wire GMAW to FCAW changes the process assumptions. Flux-cored wire can improve deposition or outdoor usability in some applications, but wire price, shielding-gas requirement, slag removal, fume control, cleanup, procedure qualification, and rework can change the total cost. Compare the two processes using the same joint, required quality, measured productivity, consumable prices, and labor scope.
How Do Gas Price Changes Affect Long-Term MIG Quotes?
Use a current delivered supplier quote and state how long your customer quotation remains valid. For long-duration work, document how cylinder rental, delivery, exchange fees, and future gas-price changes will be handled. Do not apply one universal volatility percentage to every supplier or region.
Is Post-Weld Inspection Included in a MIG Cost Estimate?
It depends on the contract scope. Basic operator checks may be part of normal labor, while documented dimensional inspection, certified visual inspection, NDT, testing, reports, or third-party inspection can require separate labor or outside-service costs. State the inspection method, coverage, documentation, and acceptance requirements in the quote.
Can Automation or Robotic MIG Change Per-Piece Pricing?
Yes. Automation can reduce repeat-cycle labor and improve consistency, but it also adds programming, fixtures, integration, maintenance, setup, changeover, operator support, and capital cost. Calculate the break-even point from the fixed automation cost and the measured per-piece savings compared with the manual process. The result is job-specific rather than a universal production quantity.
How Should Scrap and Rework Be Included in an Initial MIG Bid?
Use completed-job history for comparable work when available. Separate expected material scrap, rejected parts, weld repair labor, replacement filler and gas, grinding, inspection, and schedule impact. Add contingency only for uncertainty that remains after the expected costs are modeled, and record the actual result after the job so future bids improve.
How Do You Calculate MIG Welding Cost Per Inch?
First calculate the complete job price, including labor, filler wire, shielding gas, consumables, equipment, overhead, contingency, and the chosen markup or margin method. Then divide the final quoted price by the total weld inches. Use a per-inch figure only for jobs with comparable weld size, process, position, access, quality, and setup because those variables can change the cost sharply.
What Is the Difference Between Markup and Margin in a Welding Quote?
Markup is added to cost: quoted price = cost × (1 + markup rate). Target gross margin is calculated from the selling price: quoted price = cost ÷ (1 − target gross-margin rate). The same percentage produces different selling prices, so label the pricing method correctly in your estimate.
For typical price ranges rather than formulas, see our MIG welding cost breakdown. To turn a finished estimate into a unit price, see how to calculate welding cost per inch.
Conclusion
A reliable MIG welding quote starts with the drawing and ends with a transparent cost model. Measure the weld geometry, calculate deposited weld metal, estimate filler use and gas-on time, convert arc time into total paid labor, and add equipment, outside services, overhead, contingency, and profit without double-counting costs.
Before sending the quote, check the procedure assumptions, current supplier prices, inspection scope, exclusions, and quote-validity period. After the job, compare estimated and actual labor, wire, gas, rework, and finishing. That feedback loop is what turns a one-time calculation into a dependable MIG estimating system.