

How to calculate welding cost: it takes more than multiplying weld time by an hourly rate. A dependable estimate starts with the joint geometry and deposited weld metal, then adds filler loss, total labor, shielding gas, power, equipment, preparation, inspection, overhead, contingency, and profit. The method below gives you a repeatable way to build and check a welding quote.
Quick Answer
Calculate the weld’s cross-sectional area and multiply it by length to find volume. Convert volume to deposited weight, adjust for filler loss, and calculate arc time from deposition rate or travel speed. Add total labor, gas, power, equipment, overhead, preparation, inspection, contingency, and either markup or a target gross margin.
Key Takeaways
- Start with the drawing, weld symbol, joint dimensions, material, position, and applicable welding procedure.
- Do not confuse deposited weld metal with the amount of filler you must purchase.
- Length divided by travel speed gives arc time, not total paid labor time.
- Use your own loaded labor, supplier, utility, rental, and overhead rates instead of generic averages.
- Markup and gross margin use different formulas and produce different selling prices.
At a Glance
| Time Required | Depends on the job; faster once you build a reliable template |
| Difficulty | Moderate; accurate drawings and process data are essential |
| Tools Needed | Drawings, weld symbols, WPS data, calculator or spreadsheet, supplier prices, labor rates, and shop-cost records |
| Cost | Job-specific; use current shop, supplier, utility, rental, tax, and subcontractor rates |
Understanding the Main Components of Welding Cost
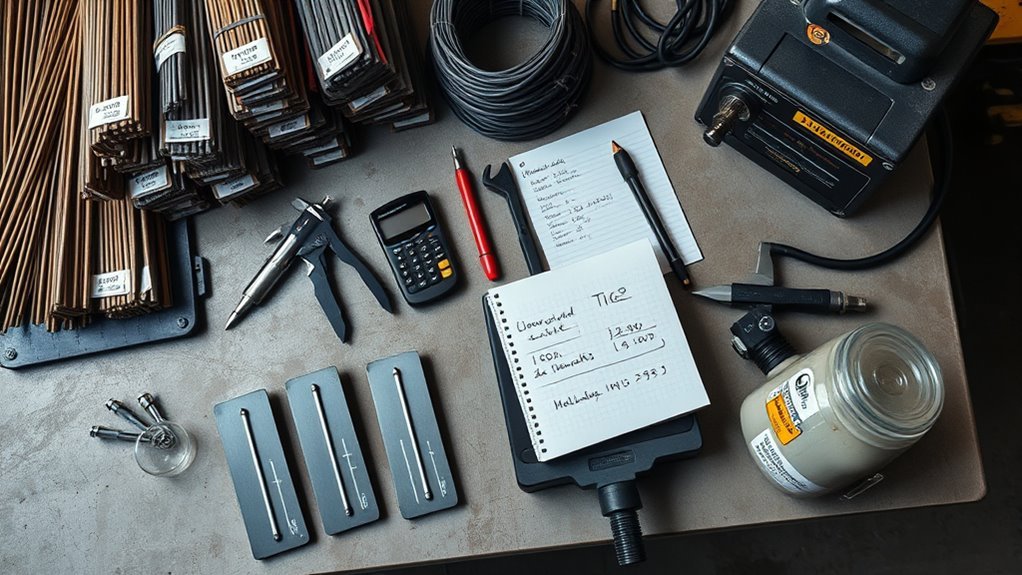
A complete welding estimate normally combines the following cost groups:
- Base material: Plate, tube, pipe, structural shapes, formed parts, and material waste.
- Weld consumables: Wire, rods, electrodes, flux, tungsten, contact tips, nozzles, anti-spatter products, and abrasives.
- Direct labor: Layout, cutting, fit-up, tacking, welding, repositioning, cleaning, inspection support, and finishing.
- Labor burden: Employer payroll costs, benefits, paid leave, training, and other labor-related expenses included in your loaded rate.
- Shielding and purge gas: Gas used during welding, preflow, postflow, purging, testing, and normal losses.
- Equipment: Depreciation or rental, maintenance, calibration, repairs, and accessories.
- Energy: Welder input power, extraction, ovens, positioners, compressors, lighting, and other job-related loads.
- Overhead: Facility rent, utilities, administration, software, supervision, insurance, and non-billable shop expenses.
- Outside services: Machining, heat treatment, nondestructive examination, coating, galvanizing, testing, and freight.
- Commercial additions: Contingency, taxes or duties where applicable, markup, and profit margin.
The cheapest hourly welding process is not always the lowest-cost process. Fit-up, handling, over-welding, repair, inspection, and finishing can cost more than the arc time itself.
Master Welding Cost Formula
Use this structure as your master calculation:
Total job cost = material + filler + gas + direct labor + equipment + energy + preparation + inspection + finishing + subcontracting + allocated overhead + contingency
After finding total job cost, calculate the selling price with either a markup or a target gross margin:
- Price with markup:
Total cost × (1 + markup rate) - Price for a target gross margin:
Total cost ÷ (1 − target margin rate)
Warning: Do not count the same expense twice. For example, if your loaded labor rate already includes payroll burden or facility overhead, do not add those costs again unless your accounting method deliberately separates them.
Define the Scope and Select the Welding Process
An accurate estimate begins with a clear scope. Review the drawings, specifications, bill of materials, weld map, and applicable welding procedure before entering costs.
Collect the Required Estimate Inputs
Record the following for every weld or group of identical welds:
- Base-metal type, grade, thickness, and quantity
- Joint type, weld symbol, size, length, pitch, and number of sides
- Root opening, bevel angle, root face, backing, and required penetration
- Welding position and access around the joint
- Required process, filler classification, shielding gas, and polarity
- Preheat, interpass-temperature, and post-weld heat-treatment requirements
- Number of passes and expected cleaning between passes
- Fit-up, fixturing, turning, handling, and tack-welding time
- Visual, dimensional, destructive, or nondestructive inspection requirements
- Surface finish, grinding, pickling, passivation, painting, or coating requirements
- Welder, procedure, operator, or inspector qualification requirements
- Travel, site access, permits, mobilization, and minimum-charge requirements
Check Material and Code Requirements
Match the base metal and filler using the applicable drawing, specification, qualified welding procedure specification, manufacturer data, and governing code. Consider weldability, hydrogen control, cracking risk, distortion, corrosion, service temperature, fatigue, and required mechanical properties.
Do not automatically apply AWS D1.1 to every project. AWS D1.1/D1.1M:2025 covers welded structures made from carbon and low-alloy constructional steels. Other work may fall under a different AWS code, ASME code, API standard, customer specification, manufacturer procedure, or local requirement. The contract may also name a specific adopted edition.
Note: A cost estimate does not replace engineering review, an approved WPS, welder qualification, inspection requirements, or code compliance.
Compare Suitable Welding Processes
Choose the process that can meet quality requirements with acceptable deposition rate, access, position, heat input, cleanup, and repair risk. Do not select a process from deposition rate alone.
| Process | Typical Cost Strength | Costs to Watch |
|---|---|---|
| GTAW/TIG | Precise control, clean appearance, useful for thin or critical work | Lower manual deposition rate, purge gas, preparation, and skilled labor |
| GMAW/MIG | Continuous wire and good production speed | Gas loss, wire-feed downtime, spatter, access, and transfer-mode limits |
| FCAW | High deposition potential and good suitability for many structural applications | Wire cost, slag removal, fumes, spatter, and consumable recovery |
| SMAW/Stick | Portable and practical for field work and restricted access | Electrode changes, stub loss, slag removal, and lower operating factor |
| SAW | High deposition and automation potential on suitable long welds | Position limits, setup, flux handling, capital equipment, and minimum batch size |
Manufacturer procedure data and shop trials are more dependable than generic process averages. Miller also cautions that deposition rate or arc-on time alone can be misleading when operators are over-welding or when poor fit-up, handling, rework, and other delays reduce completed output.
Calculate Weld Metal Volume, Weight, and Filler

Weld volume determines how much metal must be deposited. Calculate the cross-sectional area of the finished weld, then multiply it by the total weld length.
Weld volume = cross-sectional area × weld length
Keep every dimension in one unit system. For example, square inches multiplied by inches gives cubic inches.
Equal-Leg Fillet Weld Formula
For a simple equal-leg fillet weld with leg size z:
Cross-sectional area = z² ÷ 2
For a 1/4-inch fillet:
0.25² ÷ 2 = 0.03125 in²
If the weld is 20 feet long:
20 ft × 12 = 240 in
0.03125 in² × 240 in = 7.50 in³
This geometric result does not automatically include a convex face, excess reinforcement, oversized welds, variable fit-up, or starts and stops. Use drawing dimensions and measured shop history to add a realistic allowance.
Groove and Complex Welds
For a V-groove, U-groove, J-groove, unequal fillet, or combined joint, divide the cross-section into triangles, rectangles, trapezoids, circular segments, and cap reinforcement. Calculate each area, add them together, and multiply the result by length.
The TWI weld-volume method also emphasizes including the root opening and excess weld metal where applicable.
Convert Volume to Deposited Weight
Convert volume to deposited weld-metal weight with the density of the applicable alloy:
Deposited weld-metal weight = volume × density
Carbon steel is commonly estimated near 0.283 lb/in³, but stainless steels, aluminum alloys, nickel alloys, and other materials have different densities. Use product or engineering data for the actual alloy.
Using 7.50 in³ and 0.283 lb/in³:
7.50 × 0.283 = 2.12 lb of theoretical deposited steel
If measured shop records show that the weld profile averages 10% above theoretical volume:
2.12 × 1.10 = 2.33 lb of expected deposited weld metal
Pro Tip: Track actual fillet size and weld weight on repeat work. A small amount of consistent over-welding can add substantial filler and labor across hundreds of joints.
Calculate Purchased Filler
Deposited weld metal is not the same as purchased filler. Allow for electrode stubs, damaged coating, wire trim, spool remnants, spatter, flux, and other process losses.
Use either of these equivalent methods:
- Recovery method:
Purchased filler = deposited weight ÷ recovery rate - Purchase-factor method:
Purchased filler = deposited weight × purchase factor
The following factors are attributed to TWI (check the source page) and are useful only as initial estimating references. Replace them with manufacturer data or your own measured usage whenever possible.
| Process | Indicative Purchase Factor |
|---|---|
| SMAW/MMA | 1.50 |
| GTAW/TIG | 1.10 |
| GMAW/MIG or MAG | 1.05 |
| FCAW | 1.20 |
| SAW | 1.02, plus applicable flux consumption |
For the example, an indicative GMAW factor of 1.05 gives:
2.33 lb × 1.05 = 2.45 lb of purchased wire
Estimate Arc Time, Total Labor, and Labor Cost
Arc time is the period when the arc is producing the weld. Total labor is longer because the worker must also handle, fit, tack, clean, reposition, inspect, and finish the part.
Method 1: Arc Time From Deposition Rate
Arc time = expected deposited weld-metal weight ÷ deposition rate
If the expected deposited weight is 2.33 lb and the qualified procedure deposits 7.8 lb/hr:
2.33 ÷ 7.8 = 0.30 arc hour
Use a deposition rate tied to the actual process, filler, diameter, amperage, polarity, transfer mode, position, and WPS. Generic figures can vary too widely for a final bid.
Method 2: Arc Time From Travel Speed
Arc time = total weld length ÷ qualified travel speed
For a 20-foot weld made at 15 inches per minute:
240 in ÷ 15 in/min = 16 minutes, or 0.27 arc hour
The deposition-rate and travel-speed methods should be reasonably consistent when all inputs describe the same weld. A large mismatch may indicate an incorrect weld area, deposition rate, travel speed, or over-weld allowance.
Convert Arc Time to Total Labor
An operating factor is the percentage of productive welding time during a defined work period. Use it only for the activities included in the source of that factor.
Productive welding labor = arc time ÷ operating factor
At a 35% operating factor:
0.30 hr ÷ 0.35 = 0.86 labor hour
Then add separately estimated tasks that are not included:
Total labor = productive welding labor + layout + preparation + fit-up + setup + handling + inspection support + finishing
If the example needs 0.50 hour for setup and fit-up and 0.25 hour for finishing:
0.86 + 0.50 + 0.25 = 1.61 total labor hours
Calculate Your Loaded Labor Rate
Do not rely on a universal shop rate. Build a loaded rate from the costs your accounting method assigns to labor:
Loaded labor rate = base wage + payroll burden + benefits + other labor-related costs
If you also include supervision, facility, equipment, and administration in the hourly rate, document that choice so those expenses are not added again.
Using an illustrative loaded rate of $60/hr:
1.61 hr × $60/hr = $96.60 labor cost
Calculate Consumable, Gas, and Power Costs
Filler and Consumable Cost
Filler cost = purchased filler quantity × current unit price
At an illustrative wire price of $2.50/lb:
2.45 lb × $2.50 = $6.13
Add separate line items for flux, tungsten, contact tips, nozzles, liners, grinding wheels, flap discs, brushes, solvents, anti-spatter material, backing, purge dams, and other items that are meaningful to the job.
Shielding and Purge Gas Cost
Include every period when gas flows:
Total gas volume = flow rate × (arc time + preflow + postflow + purge and test time) × waste factor
If a GMAW job uses 25 cubic feet per hour for 0.35 total gas-on hour:
25 CFH × 0.35 hr = 8.75 ft³
If the delivered gas cost is $0.08/ft³:
8.75 ft³ × $0.08 = $0.70
Calculate the delivered unit rate from the usable cylinder contents plus refill, delivery, rental, hazmat, and handling charges. Do not assume the cylinder’s full nominal contents are always available.
Electrical Energy Cost
The most dependable method is to measure actual input energy with suitable metering. Include the welding power source and any job-specific extraction, positioners, ovens, compressors, heaters, or other equipment.
Energy cost = measured input kWh × electricity rate
If measured data are unavailable, estimate from defensible input-power data:
Estimated kWh = input kW × operating hours
For an illustrative 5 kW average welding input over 0.30 arc hour:
5 kW × 0.30 hr = 1.50 kWh
At $0.15/kWh:
1.50 × $0.15 = $0.23
Do not use arc volts multiplied by arc amps as if it were utility input without accounting for the power source, phase, power factor, efficiency, and auxiliary loads.
Add Equipment, Overhead, Preparation, and Finishing
Equipment Depreciation and Rental
For owned equipment, one simple internal-cost method is:
Hourly depreciation = (purchase price − expected residual value) ÷ useful operating hours
Add maintenance, calibration, repairs, insurance, and accessories according to your accounting system. For rented equipment, include the rental period, delivery, pickup, fuel, consumables, minimum term, and damage waiver.
If the example shop applies an $8 equipment rate for 1.61 labor hours:
1.61 × $8 = $12.88
Allocate Overhead
Overhead may be applied as an hourly rate, a machine rate, a percentage, or activity-based charges. Use one consistent method.
An hourly method is:
Overhead cost = applicable job hours × overhead rate
At $20/hr for 1.61 hours:
1.61 × $20 = $32.20
Price Preparation, Inspection, and Finishing
List these tasks instead of hiding them in a vague allowance:
- Cutting, beveling, drilling, machining, and edge preparation
- Mill-scale, rust, oil, paint, plating, or coating removal
- Layout, fit-up, fixturing, tacking, and distortion control
- Preheat, interpass monitoring, and post-weld heat treatment
- Visual, dimensional, leak, pressure, destructive, or nondestructive testing
- Grinding, blending, polishing, pickling, passivation, painting, or coating
- Repair allowance based on actual historical repair rates
- Packaging, freight, site travel, mobilization, permits, and documentation
For the example, assume $8 for preparation consumables and $5 for final inspection.
Warning: Welding can expose workers to metal fumes, ultraviolet radiation, burns, eye injury, electric shock, fire, and other hazards. Use the required ventilation, PPE, hot-work controls, cylinder handling, fire prevention, and confined-space procedures. Remove or evaluate coatings before heating, and follow the applicable safety rules and SDS information.
How to Calculate Welding Cost: Worked Example
This example estimates a 20-foot-long, 1/4-inch equal-leg carbon-steel fillet weld made with GMAW. Every rate is illustrative. Replace it with current job and shop data.
| Line Item | Calculation | Cost |
|---|---|---|
| Theoretical weld volume | 0.5 × 0.25² × 240 in | 7.50 in³ |
| Expected deposited weight | 7.50 × 0.283 × 1.10 | 2.33 lb |
| Purchased wire | 2.33 × 1.05 × $2.50/lb | $6.13 |
| Arc time | 2.33 lb ÷ 7.8 lb/hr | 0.30 hr |
| Total labor | 0.30 ÷ 0.35 + 0.50 setup + 0.25 finish | 1.61 hr |
| Labor | 1.61 hr × $60/hr | $96.60 |
| Shielding gas | 25 CFH × 0.35 hr × $0.08/ft³ | $0.70 |
| Electricity | 5 kW × 0.30 hr × $0.15/kWh | $0.23 |
| Equipment | 1.61 hr × $8/hr | $12.88 |
| Overhead | 1.61 hr × $20/hr | $32.20 |
| Preparation consumables | Entered allowance | $8.00 |
| Inspection | Entered allowance | $5.00 |
| Baseline cost | Sum of cost items | $161.74 |
| Contingency | $161.74 × 10% | $16.17 |
| Total job cost | Baseline + contingency | $177.91 |
Using a 20% markup:
$177.91 × 1.20 = $213.49 selling price
Using a target 20% gross margin:
$177.91 ÷ 0.80 = $222.39 selling price
Note: Base steel, cutting, freight, taxes, travel, permits, and subcontracted work were not included in this simplified example. Add every item required by the actual scope.
Common Welding Estimating Mistakes
- Pricing only arc time: This ignores most handling, setup, cleaning, and finishing labor.
- Using the sidewall or catalogue maximum as production data: Maximum deposition claims may not match the qualified procedure or welding position.
- Ignoring over-welding: Oversized fillets increase both filler weight and arc time.
- Using filler weight as deposited weight: Consumable loss must be included.
- Ignoring purge and postflow gas: Arc time alone can understate gas use.
- Using one operating factor for every job: Field work, confined access, repositioning, and small batches can sharply reduce productive time.
- Double-counting overhead: Define what is already included in the labor or machine rate.
- Leaving inspection and documentation out: Reports, traceability, testing, and hold points require time.
- Calling markup margin: The formulas are different.
- Using old prices: Update filler, gas, steel, freight, utilities, rentals, and subcontractor quotes before issuing the bid.
Validate and Improve Future Estimates
Compare every completed job with the estimate. Record at least:
- Actual deposited or purchased filler
- Arc-on time and total paid labor
- Setup, handling, inspection, and finishing hours
- Gas and consumable use
- Repairs, scrap, and rework
- Completed pieces or weld length
- Equipment downtime
- Final gross profit
For a job-specific deposition test, weigh a clean test plate, weld for a measured arc-on period with the planned parameters, remove slag and loose spatter as appropriate, and weigh it again. The weight gain divided by arc time gives a practical deposition rate for those conditions.
Update your estimating factors when actual results repeatedly differ from the quote. This turns the spreadsheet into a shop-specific costing system instead of a collection of generic assumptions.
Frequently Asked Questions
What labor rate should I use for welding estimates?
Use your shop’s loaded labor rate rather than a universal average. Include the base wage and the payroll burden, benefits, and other labor costs assigned by your accounting method. Clearly document whether supervision, equipment, facility overhead, and profit are included or added separately.
How do taxes and duties affect final welding cost?
Taxes, import duties, brokerage, and customs charges depend on the jurisdiction, transaction, and contract. Identify whether each charge is part of your cost, separately billed to the customer, exempt, or recoverable. Confirm the treatment with current accounting or tax guidance before issuing the quote.
Can base-material quality change welding expenses?
Yes. Material grade, surface condition, dimensional tolerance, traceability, coating, weldability, and certification can change preparation, filler selection, preheat, testing, repair risk, and purchasing cost. Better-quality material may sometimes reduce fit-up or repair time, so assess the complete effect rather than assuming it always costs more to weld.
How should I price rush or emergency welding jobs?
Add documented charges for overtime, after-hours access, expedited materials, travel, priority scheduling, mobilization, standby time, and disruption to planned work. State the emergency scope, response assumptions, cancellation terms, and exclusions in writing.
Do warranties and liability insurance change welding prices?
They can. Include the cost of required insurance, bonding, certificates, warranty administration, expected corrective work, record retention, and contract risk. Review unusual indemnity, warranty, or liability terms before accepting the work.
How should currency changes be handled in international quotes?
State the quote currency, exchange-rate basis, validity period, payment schedule, and the party responsible for conversion fees. For long projects, consider contract-approved adjustment clauses or financial risk controls with qualified financial advice.
What is the difference between welding markup and gross margin?
Markup is a percentage added to cost, so price equals cost multiplied by one plus the markup rate. Gross margin is profit divided by selling price, so price equals cost divided by one minus the target margin. A 20% markup is not the same as a 20% gross margin.
Should a welding shop have a minimum charge?
A minimum charge can recover the real cost of quoting, scheduling, paperwork, setup, consumable handling, equipment preparation, and cleanup on very small jobs. Base it on actual shop costs and disclose it before work begins.
Related guides: welding cost estimation workflow, how to calculate MIG welding cost, how to calculate TIG welding cost, and how to calculate welding cost per inch. For typical market prices, see the welding cost guide.
Sources
- TWI: Calculating Weld Volume and Weight — weld-area, volume, density, and weight calculations
- TWI: Welding Costs — consumable purchase factors, gas usage, and operating factors
- TWI: Welding Costs Continued — deposition rates, cost controls, joint preparation, and validation
- American Welding Society: AWS D1.1/D1.1M:2025 Release — current structural-steel code edition and scope
- OSHA: Welding, Cutting, and Brazing Hazards and Solutions — welding health and safety hazards
- Miller Electric: Turning Welding Data Into Dollars — productivity measurement and cost validation
Conclusion
A sound welding estimate follows a clear chain: define the joint, calculate deposited weld metal, estimate purchased filler, determine arc time, convert it to total labor, and add every supporting cost. Keep markup separate from margin, avoid double-counting overhead, and compare completed jobs with your estimates. Accurate shop data will make each future quote faster, more competitive, and more profitable.


3 thoughts on “How to Calculate Welding Cost (Step-by-Step)”
Pingback: MIG Welding Cost Breakdown: Equipment, Labor, And Consumables
Pingback: How To Calculate MIG Welding Costs: Step-by-Step Guide
Pingback: How To Calculate TIG Welding Costs: Step-by-Step Guide