Pipe welding cost per foot is not a universal rate. Estimate the job joint by joint, total the labor, filler metal, gas, preparation, equipment, inspection, mobilization, overhead, contingency, and markup, then divide the final quoted price by installed pipe footage. Start with a weld takeoff: count each butt weld, socket weld, branch, fitting, tie-in, and repair, and record its diameter, wall thickness, material, joint preparation, position, access, and examination requirements.
Quick Answer
To estimate pipe welding cost per foot, build a joint-by-joint weld map, calculate weld-metal volume and filler required, estimate arc time and total crew hours, then add gas, preparation, inspection, equipment, mobilization, overhead, contingency, and markup. The blended rate is quoted project price ÷ installed pipe footage.
Key Takeaways
- Price the welds first. Total pipe footage alone does not reveal how many joints, fittings, branches, or field tie-ins must be welded.
- Use the actual joint preparation and approved welding procedure to calculate weld-metal volume, filler consumption, deposition rate, and number of passes.
- Separate arc time from fit-up, handling, purging, preheat, inspection, cleanup, testing, and documentation.
- Treat overhead, contingency, and profit as separate lines so the estimate remains clear and auditable.
- Use current supplier quotes, loaded labor rates, and production records instead of universal percentages or generic cost-per-foot averages.
At a Glance
| Time Required | Scope-dependent; a small, well-defined takeoff is faster, while a coded project with many sizes, weld types, field conditions, and inspection requirements can require substantially more estimating time |
| Difficulty | Intermediate to advanced; pressure-piping estimates require accurate drawings, welding knowledge, and familiarity with the governing specification |
| Tools Needed | Isometric drawings, weld map, pipe schedule data, WPS, calculator or spreadsheet, labor rates, production records, consumable quotes, equipment rates, and inspection requirements |
| Cost | Project-specific; diameter, wall thickness, alloy, joint count, access, welding process, examination, mobilization, and field conditions can change the rate substantially |
Pipe Welding Cost Per Foot Formula
Use pipe footage as the final reporting unit, not as the starting weld quantity. First total the costs created by the actual joints and project conditions:
Estimated project cost = direct cost + indirect cost + contingency
Quoted project price = estimated project cost + markup
Pipe welding cost per installed foot = quoted project price ÷ installed pipe footage
Direct cost can include welding and fitting labor, filler, shielding or purge gas, consumables, equipment, examination, testing, heat treatment, and direct travel. Indirect cost can include supervision, administration, safety management, insurance, and other allocated overhead. This structure avoids treating a 100-foot straight run with a few joints as equivalent to a 100-foot spool with many fittings, branches, and tie-ins.
If you need market-facing pricing strategy rather than a technical weld takeoff, see Pipe Welding Rates: How to Price Your Work. Keep this page focused on engineering the estimate from joint geometry, production time, and project-specific requirements.
Warning: This estimating method does not replace engineering drawings, the governing construction code, an approved welding procedure specification, qualified welding personnel, or site safety rules. Include applicable hot-work fire-prevention, PPE, and ventilation controls, plus atmospheric testing, confined-space controls, isolation, and pressure-testing precautions whenever the scope requires them.
Gather Project Scope and Pipe Measurements
Start by defining exactly what the welding price includes. Record the piping material, nominal pipe size, actual outside diameter, wall thickness or schedule, total installed footage, design drawings, service, location, and required completion date.
Material affects more than filler-metal price. Carbon steel, stainless steel, chrome-moly steel, aluminum, nickel alloy, and lined or clad pipe may require different filler classifications, cleanliness controls, purging, preheat, interpass limits, heat treatment, and examination.
Create a Joint-by-Joint Weld Map
A weld map is more reliable than estimating directly from total run length. Count and classify:
- Pipe-to-pipe butt welds
- Elbows, tees, reducers, caps, and flange welds
- Socket welds and threaded-to-welded transitions
- Branch connections, reinforcing pads, and stub-ins
- Shop welds, field welds, and final closure welds
- Existing-system tie-ins
- Temporary attachments and their removal
- Expected repairs or owner-directed test welds
For each weld, record the pipe size, wall thickness, material specification, joint design, welding process, position, accessibility, elevation, and required examination. A small project with many fittings can contain far more welding than a long straight run made from large pipe sections.
Calculate the Weld Length Around Each Pipe
For a full-circumference butt weld, use the actual outside diameter rather than nominal pipe size:
Circumference per joint = π × actual outside diameter
For example, a pipe with a 4.5-inch outside diameter has a joint circumference of approximately 14.14 inches:
3.1416 × 4.5 inches = 14.14 inches
Multiply that circumference by the number of identical butt joints to obtain the total groove-weld length. Calculate socket welds, fillet welds, branches, and reinforcing pads separately because their joint geometry differs.
Pro Tip: Add a unique weld number to every joint on the estimate. The same number can follow the weld through fabrication, inspection, repair tracking, invoicing, and turnover documentation.
Identify Code, Procedure, and Quality Requirements
Determine the governing code and project specification before selecting production rates. ASME publishes B31.3 for process piping and B31.1 for power piping, and API publishes Standard 1104 for pipeline welding. Editions change, so confirm the current edition on the publisher page. The contract documents, adopted code edition, and jurisdiction decide which requirements apply.
Qualification requirements also affect cost. ASME publishes BPVC Section IX for welding, brazing, and fusing qualifications. Apply the edition invoked by the governing construction code and project documents rather than assuming the newest edition automatically controls an existing contract.
Check the estimate for:
- Available and approved welding procedure specifications
- Procedure qualification records or new qualification testing
- Welder or welding-operator qualifications
- Material traceability and filler-metal control
- Preheat and interpass-temperature requirements
- Backing, consumable inserts, or internal purging
- Post-weld heat treatment and hardness testing
- Visual examination and nondestructive examination
- Hydrostatic, pneumatic, leak, or service testing
- Weld logs, inspection reports, heat charts, and turnover packages
Do not apply one inspection percentage to every job. Price the actual method, examination percentage, minimum callout, technician travel, equipment, reports, film or data storage, retests, and repair-cycle inspection.
Select Welding Processes and Joint Preparations
The welding process and joint preparation determine weld volume, filler type, deposition rate, cleanup, equipment needs, and labor. Select them from the engineering specification and approved WPS rather than choosing solely by apparent speed.
| Process or condition | Items that affect the estimate |
|---|---|
| GTAW | Controlled root quality and clean deposits, but generally lower deposition; may require shielding gas, trailing coverage, or internal purge gas |
| SMAW | Portable field process; include electrode stub loss, oven or heated-quiver control where required, slag removal, and interpass cleaning |
| GMAW or mechanized wire process | Potentially higher productivity, but include feeders, shielding gas, power, setup, wind protection, qualification limits, and equipment moves |
| FCAW | Higher deposition may reduce arc time; include wire classification, shielding gas when applicable, slag removal, fumes, and access restrictions |
| Open-root groove | Root face, bevel angle, root gap, alignment, tack welding, purge or backing, number of passes, and cap reinforcement |
| Restricted field joint | Scaffolding, excavation, mirrors, remote viewing, forced position, weather protection, permits, and slower handling |
Record the bevel angle, root face, root gap, backing details, cap dimensions, and any allowable mismatch. Small changes in groove dimensions can materially change deposited weight on thick-wall or large-diameter pipe.
Calculate Weld Metal Volume and Filler Required
Use the joint drawing or WPS dimensions to determine the weld’s cross-sectional area. Divide a complex groove into simple shapes such as rectangles, triangles, and cap reinforcement, calculate each area, and add them together.
The basic formulas are:
Weld volume = weld cross-sectional area × weld length
Deposited weld-metal weight = weld volume × alloy density
The current TWI weld-volume and weight guide explains this geometric method for fillet, single-V, double-V, J, and U preparations.
Pipe footage does not determine filler consumption by itself. Filler demand comes from the number of welds, each joint’s circumference, its cross-sectional weld area, and the selected process efficiency.
Convert Deposited Metal to Purchased Filler
Deposited weld metal and purchased filler are not the same. Some filler becomes electrode stubs, spatter, slag-related loss, wire-trimming loss, or unused package remainder.
Purchased filler weight = deposited weld-metal weight ÷ deposition efficiency
Use a deposition efficiency supported by the selected process, consumable data, shop records, or a welding productivity tool. Do not apply one value to every process.
Then calculate filler cost:
Filler cost = purchased filler weight × delivered filler price per pound
Include freight, alloy surcharges, taxes, minimum package quantities, certification charges, controlled storage, and unused material when they apply.
Note: A corrosion allowance may result in the engineer selecting a thicker pipe wall. Estimate the weld from that actual wall thickness and the specified joint preparation. Do not add weld metal merely because the design documents mention corrosion allowance.
Estimate Welding Labor Hours and Productivity
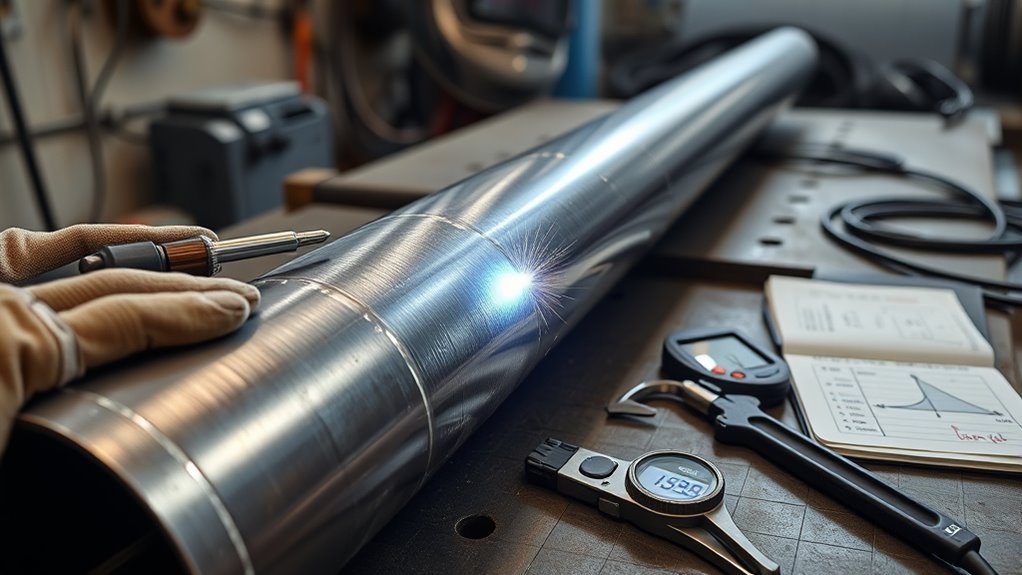
Labor is often the largest cost, so separate true arc time from the other work needed to complete and document the joint.
Calculate Arc Time
Arc time = deposited weld-metal weight ÷ net deposition rate
Net deposition rate must match the selected process, wire or electrode, diameter, amperage, transfer mode, position, joint, and procedure limits.
Apply an Operating Factor
The operating factor is the proportion of paid welding time during which the arc is actually depositing weld metal.
Welder production hours = arc time ÷ operating factor
For example, 2.5 arc hours at a documented 30% operating factor equals approximately 8.33 welder production hours:
2.5 ÷ 0.30 = 8.33 hours
The ESAB Quick Weld Productivity Analyzer uses inputs such as joint cross-sectional area, joint length, process parameters, deposition rate, arc time, and operating factor when evaluating welding cost.
Avoid adding a blanket setup percentage if setup, cleaning, electrode changes, repositioning, and ordinary handling are already built into the operating factor. That would count the same time twice.
Add Labor Not Included in the Welding Factor
Estimate separate crew hours when they are not already included:
- Material receiving and identification
- Cutting, beveling, facing, and cleaning
- Fit-up, alignment, clamping, and tacking
- Moving machines, leads, gas cylinders, and shelters
- Scaffolding, lifts, excavation, or confined-space entry
- Internal purge setup and purge monitoring
- Preheat, interpass-temperature checks, and insulation
- Grinding, interpass cleaning, and final blending
- Inspection support and repair excavation
- Pressure-test preparation and restoration
- Weld mapping, material records, and turnover documentation
Calculate labor by employee classification:
Labor cost = Σ crew hours × loaded hourly rate for each classification
A loaded rate may include wages, payroll taxes, insurance, benefits, and other labor burdens. Do not add the same burden again under overhead if it is already included in the loaded rate.
Adjust for Field Conditions
Shop production data should not be copied directly into a field estimate without adjustment. Consider:
- Fixed versus rolled position
- Overhead, vertical, or restricted access
- Weather and wind protection
- Work at height or below grade
- Hot-work and operating-facility permits
- Congestion from other trades
- Shift restrictions and limited work windows
- Long travel paths for tools and materials
- Cleanroom, food-grade, oxygen-service, or high-purity controls
- Shutdown tie-ins and standby risk
Use completed-job records whenever possible. Compare estimated and actual hours by pipe size, wall thickness, process, joint type, position, and location so future estimates become more accurate.
Determine Consumables, Gas, and Equipment Costs

After labor and filler are established, calculate every additional resource used to make the weld.
Shielding and Purge Gas
For gas delivered at a measured flow rate:
Shielding-gas volume = flow rate in CFH × gas-on hours
Shielding-gas cost = gas volume × delivered cost per cubic foot
Add cylinder rental, delivery, hazmat fees, minimum fills, hose purging, start-and-stop losses, leaks, and unused residual gas where relevant.
Calculate internal purge gas separately. Purge consumption can include an initial displacement period, continuous root-pass flow, dams or soluble-paper installation, oxygen verification, and extended purging required by the procedure.
Small Consumables
- Grinding and cutoff wheels
- Tungsten electrodes, collets, cups, diffusers, and gas lenses
- Contact tips, liners, nozzles, and drive-roll wear
- Electrode ovens, heated quivers, and storage supplies
- Anti-spatter products and cleaning chemicals
- Purge dams, tape, foil, and oxygen-sensing supplies
- Markers, temperature crayons, thermocouples, and heat-resistant blankets
- Wire brushes dedicated to specific alloys
Equipment and Energy
Allocate owned equipment through a documented hourly or daily ownership rate, or use the actual rental quote. Include:
- Welding power source and wire feeder
- Generator or engine-driven welder
- Orbital or mechanized welding equipment
- Beveling and facing machines
- Positioners, rollers, clamps, and alignment tools
- Preheat and post-weld heat-treatment equipment
- Ventilation, fume extraction, and gas monitoring
- Scaffolds, lifts, lighting, and weather enclosures
Where energy is material to the estimate:
Energy cost = input power in kW × machine-on hours × electricity rate per kWh
Use input power rather than welding output alone. If the equipment rate already includes fuel, maintenance, and depreciation, do not add those costs a second time.
Add Inspection, Testing, and Post-Weld Activities
Inspection and post-weld work should be estimated from the project’s inspection and test plan rather than as a generic percentage of welding labor.
Inspection and Nondestructive Examination
Price each required service separately:
- Visual examination
- Liquid penetrant testing
- Magnetic particle testing
- Radiographic testing
- Ultrasonic or phased-array ultrasonic testing
- Positive material identification
- Ferrite, hardness, or alloy verification
- Inspector callout, travel, overtime, reports, and retests
Clarify who pays for examination of accepted welds, repairs, owner-requested additional testing, and delays caused by access or unavailable systems.
Preheat and Post-Weld Heat Treatment
When required, include heaters, power, fuel, insulation, thermocouples, temperature recorders, technicians, heating and cooling time, hardness tests, and chart review. Heat treatment can also affect the work sequence and delay other trades.
Cleaning, Finishing, and Restoration
Include final grinding, spatter removal, slag removal, pickling, passivation, flushing, drying, coating repair, painting, fireproofing repair, and insulation removal or reinstatement when these tasks are within scope.
Pressure and Leak Testing
Testing can require temporary blinds, vents, drains, pumps, calibrated gauges, water treatment, drying, test media, exclusion zones, permits, and restoration. Keep testing separate from the welding unit rate unless the contract clearly bundles it.
Add Overhead and Indirect Project Costs
Overhead covers real costs that cannot always be assigned to one weld. Use the company’s accounting method rather than a generic industry percentage.
Possible indirect costs include:
- Estimating and project management
- Supervision and quality administration
- Office, shop, warehouse, and utility expenses
- Insurance, licensing, bonding, and permits
- Safety management and training
- Tool control and calibration
- Material handling and inventory administration
- Vehicles, trailers, communications, and site facilities
- Nonproductive travel, orientation, and security processing
Check the basis of every rate. Equipment depreciation should not appear in both an equipment ownership rate and the overhead pool. Labor burden should not appear in both loaded labor and overhead.
Price Travel, Mobilization, and Minimum Charges
Travel and mobilization can dominate a small pipe-welding job even when the direct welding time is short. Itemize:
- Mileage, airfare, freight, tolls, parking, and vehicle charges
- Per diem, lodging, and travel labor
- Equipment loading, transport, unloading, and return
- Site orientation, badging, permits, and initial setup
- Cylinder delivery and pickup
- Standby time and remobilization caused by schedule changes
A minimum service charge can be clearer than forcing all mobilization into a misleadingly high per-foot welding rate. State whether demobilization and return visits are included.
Compile Contingency, Profit, and the Final Per-Foot Rate
Build the estimate in layers so the customer and estimator can see how the final price was formed.
- Direct cost: welding labor, fitting labor, filler, gas, consumables, equipment, inspection, testing, heat treatment, and direct travel.
- Indirect cost: project supervision, administration, facilities, safety management, insurance, and other allocated overhead.
- Contingency: a documented allowance for unresolved quantities, access, schedule, weather, repair exposure, or other identified risk.
- Profit or markup: the contractor’s return, shown separately from production cost and contingency.
Do Not Confuse Markup With Profit Margin
Markup and profit margin use different denominators. A 10% markup on a $100 estimated cost produces a $110 quoted price, which is a 9.09% profit margin. If the commercial target is a 10% profit margin instead, the selling-price formula is price = cost ÷ (1 − margin), so $100 ÷ 0.90 = $111.11. State which method the company uses before applying the percentage.
The final formulas are:
Estimated project cost = direct cost + indirect cost + contingency
Quoted project price = estimated project cost + profit or markup
Pipe welding price per installed foot = quoted project price ÷ installed pipe footage
Also report cost per weld or price per joint when possible. That makes additions and deletions easier to price than relying on the blended per-foot figure alone.
Pipe Welding Cost Per Foot: Worked Example
The following example demonstrates the method. The rates are hypothetical estimating inputs, not market averages.
Assume a 100-foot carbon-steel piping scope contains eight identical 4.5-inch-OD butt welds. The approved joint design has a calculated weld cross-sectional area of 0.16 square inch.
1. Calculate Total Weld Length
Circumference per joint = 3.1416 × 4.5 = 14.14 inches
Total weld length = 14.14 × 8 joints = 113.12 inches
2. Calculate Deposited Weld-Metal Weight
Weld volume = 0.16 square inch × 113.12 inches = 18.10 cubic inches
Using a carbon-steel density of 0.283 pound per cubic inch:
Deposited weight = 18.10 × 0.283 = 5.12 pounds
3. Calculate Filler Purchased
Assume the selected process and company records support a 65% deposition efficiency:
Filler purchased = 5.12 ÷ 0.65 = 7.88 pounds
At a delivered filler price of $7.00 per pound:
Filler cost = 7.88 × $7.00 = $55.16
4. Calculate Arc and Labor Time
Assume a net deposition rate of 2.0 pounds per arc hour:
Arc time = 5.12 ÷ 2.0 = 2.56 hours
Assume verified project conditions support a 30% operating factor:
Welder production hours = 2.56 ÷ 0.30 = 8.53 hours
Assume one welder at a loaded rate of $72 per hour and one fitter/helper at $48 per hour for the same production period:
Labor cost = 8.53 × ($72 + $48) = $1,023.60
5. Add Other Direct Costs
| Loaded crew labor | $1,023.60 |
| Filler metal | $55.16 |
| Shielding gas and purge/start losses | $10.00 |
| Grinding wheels and small consumables | $65.00 |
| Equipment allocation | $180.00 |
| Required examination | $240.00 |
| Mobilization | $300.00 |
| Direct-cost subtotal | $1,873.76 |
6. Add Indirect Cost, Risk, and Profit
Assume this contractor’s accounting system assigns 12% project overhead:
Overhead = $1,873.76 × 0.12 = $224.85
Assume the documented scope risk supports an 8% contingency on direct cost plus overhead:
Contingency = ($1,873.76 + $224.85) × 0.08 = $167.89
Estimated cost = $1,873.76 + $224.85 + $167.89 = $2,266.50
Assume a 10% markup on estimated cost:
Quoted price = $2,266.50 × 1.10 = $2,493.15
Blended price per installed foot = $2,493.15 ÷ 100 = $24.93 per foot
Average quoted price per weld = $2,493.15 ÷ 8 = $311.64 per joint
This example shows why the final per-foot figure is project-specific. Changing the joint count, examination scope, access, alloy, wall thickness, process, or mobilization can change the result even when installed footage stays the same.
7. Run a Sensitivity Check Before Quoting
Recalculate the estimate with a low, base, and high case for the inputs that carry the most uncertainty. Typical sensitivity items include operating factor, crew hours, repair exposure, examination callouts, mobilization, access equipment, and material or gas pricing. Keep the formulas fixed and change only the uncertain inputs so the estimator can see which assumptions move the final per-foot rate the most.
Pipe Welding Estimate Template
| Scope and quantities | Installed footage, weld number, joint type, quantity, NPS, OD, schedule, wall thickness, material, fitting type, shop/field location |
| Technical requirements | Code and edition, project specification, WPS, position, process, filler, purge, preheat, PWHT, examination, testing |
| Weld-metal calculation | Cross-sectional area, circumference or weld length, volume, density, deposited weight, deposition efficiency, purchased filler |
| Labor | Deposition rate, arc time, operating factor, welder hours, fitter hours, helper hours, supervision, documentation, loaded rates |
| Materials and equipment | Filler, gas, purge materials, abrasives, power, fuel, rentals, owned-equipment allocation, scaffolding, heat treatment |
| Quality and testing | Inspection method, percentage, minimum callout, travel, reports, retests, pressure test, cleaning, passivation, coating repair |
| Commercial summary | Direct cost, overhead, mobilization, contingency, profit, taxes, exclusions, total quote, price per weld, and blended price per installed foot |
Common Pipe Welding Estimating Mistakes
- Using pipe footage as the weld quantity: Build a joint schedule first.
- Using nominal diameter as circumference: Use the actual outside diameter.
- Ignoring fittings and branches: Count every weld shown on plans and isometrics.
- Applying one inches-per-hour rate: Match productivity to the joint, process, position, and field conditions.
- Confusing deposition efficiency with operating factor: One affects purchased filler; the other converts arc time to paid production time.
- Using shop rates for restricted field work: Adjust for access, permits, weather, elevation, and material movement.
- Forgetting purge and heat-treatment time: These can exceed the cost of the filler metal.
- Using a generic inspection percentage: Price the actual method, quantity, callout, reports, and retests.
- Double-counting burden or depreciation: Check what is already included in loaded labor, equipment rates, and overhead.
- Leaving out profit: Production cost is not the same as a selling price.
- Hiding mobilization in a per-foot rate: Show fixed costs separately, especially on small jobs.
- Failing to document exclusions: State responsibility for supports, insulation, coatings, testing, permits, access, and repairs.
Frequently Asked Questions
How do you calculate pipe welding cost per foot?
Estimate each weld first. Total labor, filler metal, shielding or purge gas, preparation, consumables, equipment, examination, testing, mobilization, indirect costs, contingency, and markup. Then divide the completed quoted project price by the installed pipe footage. Do not estimate directly from pipe length because identical footage can contain very different numbers and types of welds.
How do weld codes affect final cost calculations?
The governing code and project specification can require qualified procedures and personnel, controlled materials, preheat, heat treatment, examination, testing, traceability, and documentation. Identify the applicable code and edition before estimating because these requirements affect labor, equipment, inspection, scheduling, and repair exposure.
Can corrosion allowance change filler-metal estimates?
It can affect the estimate indirectly when the designer selects a thicker pipe wall. Calculate filler from the actual wall thickness, joint preparation, drawings, and WPS. Do not add extra weld metal solely because the design includes a corrosion allowance. Price corrosion-resistant overlay or cladding only when it is specifically required.
How should travel and mobilization be priced?
List mileage, travel labor, airfare, freight, per diem, lodging, equipment transport, cylinder delivery, setup, orientation, permits, and demobilization separately. A flat mobilization or minimum service charge is often clearer than spreading every fixed cost across a small number of pipe feet.
Do joint-access difficulties alter productivity rates?
Yes. Restricted access can increase fit-up, repositioning, cleaning, inspection support, and arc interruptions. Record the actual restriction, required access equipment, welding position, permit limits, and crew movement instead of applying an unexplained blanket multiplier.
Are taxes and duties included in material costs?
Not always. Use delivered or landed cost when possible and verify whether quotes include sales tax, freight, alloy surcharges, duties, hazmat fees, certification charges, and minimum-order quantities. State any excluded taxes clearly in the commercial proposal.
Should pipe welding be quoted per foot or per joint?
Estimate it per joint first because joint count, diameter, wall thickness, type, position, and examination drive welding cost. You can then divide the full quoted project price by installed footage to provide a blended per-foot rate. Keeping a per-joint schedule also makes change orders easier to price.
What is the difference between deposition efficiency and operating factor?
Deposition efficiency compares deposited weld-metal weight with the amount of filler consumed, so it affects filler purchasing. Operating factor compares arc-on time with paid production time, so it affects labor. Using the terms interchangeably can understate both material and labor cost.
Related guides: how to calculate welding cost per inch, the weld estimating guide for quoting by the inch, and the general welding cost calculation guide.
Conclusion
A defensible pipe welding cost per foot begins with an accurate joint schedule. Count and classify every weld, calculate its circumference and weld-metal volume, convert deposited metal to purchased filler, estimate arc time and crew hours, and add purging, preparation, equipment, inspection, testing, indirect costs, contingency, and profit.
Keep the calculation transparent. Show assumptions, exclusions, unit rates, code requirements, and fixed mobilization costs, then report both the price per joint and the blended price per installed foot. Before issuing the quote, run a sensitivity check on the least-certain inputs. After the job, compare estimated and actual hours, filler use, inspection cost, and repair time so future production factors reflect the work your crew truly performs.
Sources
- TWI — Calculating Weld Volume and Weight — supports weld-area, volume, density, and deposited-weight calculations.
- ESAB — Quick Weld Productivity Analyzer — supports process-specific estimating with deposition rate, joint area, arc time, operating factor, labor, energy, and consumable inputs.
- ASME B31.3 — Process Piping — identifies requirements covering process-piping fabrication, examination, inspection, and testing.
- ASME B31.1 — Power Piping — identifies requirements for power-piping design, fabrication, examination, inspection, testing, operation, and maintenance.
- ASME BPVC Section IX — supports welding-procedure and welding-personnel qualification requirements.
- API Standard 1104 — identifies welding requirements for pipelines and related facilities.
- OSHA 29 CFR 1910.252 — supports hot-work fire prevention, PPE, ventilation, and confined-space safety controls.