
Quoting welding by the inch can work for repeatable shop jobs, but the inch rate should be the result of a full cost estimate—not a guess. Measure the joint, follow the drawing or welding procedure, estimate production time, add non-welding labor and every job cost, then divide the final quote by the billable weld length.
Quick Answer: How to Price Welding by the Inch
To quote welding by the linear inch, calculate the full job cost first, then divide that total by the total billable seam length:
Price Per Inch = (Total Labor + Materials + Consumables + Overhead + Contingency + Profit) ÷ Billable Seam Inches
Never use a flat national per-inch rate. A 24-inch single-pass MIG fillet on 1/8″ sheet costs significantly less than a 24-inch 3-pass TIG root-and-cap on 1/2″ plate. Calculate your true arc time, multiply by your process operating factor, add prep and fit-up labor, apply your burdened shop rate, and enforce your minimum shop fee.
Key Takeaways
- Treat price per inch as an output metric for benchmarking, never as an unverified starting estimate.
- Follow the qualified Welding Procedure Specification (WPS) to determine exact weld size, process, position, and pass sequence.
- Factor in non-welding labor: material prep, cutting, beveling, fit-up, tacking, preheat, interpass cleaning, inspection, and grinding.
- Calculate your true shop rate from fully loaded wages (payroll tax, insurance, benefits), facility overhead, and billable utilization.
- Always establish a minimum shop charge ($100–$175) or mobile mobilization fee ($250–$450) before applying per-inch pricing.
At a Glance: Welding Cost Estimating Benchmarks
| Estimating Time | 15–45 minutes for standard shop drawings; 1–3 hours for code work, field repairs, or structural takeoffs |
| Required Inputs | Approved drawing/WPS, billable seam length, travel speed (IPM), operating factor, burdened hourly rate |
| Average Shop Rate | $85–$135/hour for general fabrication; $120–$180+/hour for mobile rigs, sanitary TIG, or ASME pressure code |
| Typical Minimum Charge | $100–$175 shop minimum; $250–$450 mobile call-out minimum (covers mobilization, setup, and cleanup) |
How to Quote Welding Jobs by the Inch (The Bottom-Up Formula)
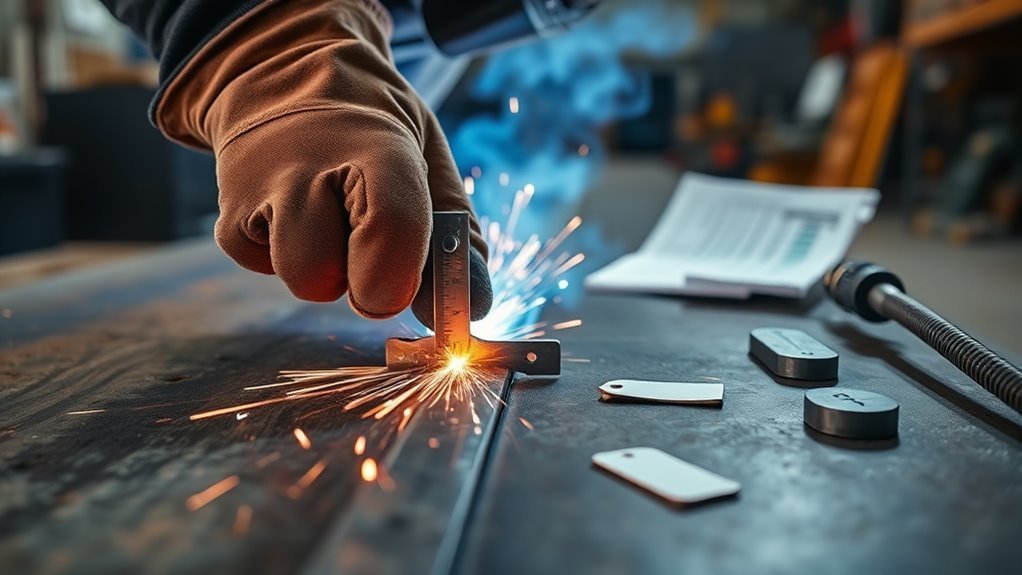
Do not begin with an arbitrary national dollar figure and assume it fits every job. A short TIG repair on stainless tubing, a long flat-position MIG fillet on mild steel plate, and an out-of-position vertical groove weld under AWS D1.1 may share the exact same measured seam length but exhibit radically different labor, shielding gas, and inspection costs. Your baseline inch rate should always come from an itemized bottom-up estimate.
Use this master estimating formula:
Total Quoted Price = Labor (Arc + Non-Arc Hours × Hourly Rate) + Raw Materials + Filler Metal & Shielding Gas + Consumables & Power + Subcontracting + Mobilization + Overhead Allocation + Contingency Risk + Target Profit Margin.
Once you calculate the total quote, divide that number by the total billable seam inches. Save this derived price per inch in your shop job records alongside the joint type, material grade, and process to build accurate historical bidding benchmarks.
Eight Steps to Calculate an Accurate Weld Quote
- Define the Scope and Specifications: Verify drawing revisions, material grade, plate thickness, joint geometry, weld symbols, leg sizes, required finish, tolerances, total piece count, and whether base metals are customer-supplied.
- Confirm the Qualified Procedure (WPS): Reference the specified Welding Procedure Specification (WPS), code standard, or shop procedure. The American Welding Society outlines variable controls for joint design, position, and filler in its Standard Welding Procedure Specifications (SWPS).
- Measure Billable Seam Length: Measure the physical path requiring weld metal. Itemize continuous welds, intermittent skip welds, tack welds, and welds requiring two-sided access.
- Calculate Arc Time & Total Production Time: Determine pure torch travel time from travel speed (IPM) or deposition rates, then divide by your measured process Operating Factor.
- Add Non-Arc Support Labor: Account for material handling, layout, beveling, fit-up, clamping, preheating, interpass temperature maintenance, repositioning, grinding, non-destructive testing (NDT), and paperwork.
- Calculate Direct Job Costs: Price plate/pipe drops, filler wire, shielding gas volume (CFH × arc time), tungsten, nozzles, contact tips, abrasives, electricity/fuel, and third-party services.
- Allocate Business Overhead and Risk: Incorporate shop facility overhead and add a job-specific contingency (5%–15%) for fit-up variation, distortion control, or repair discovery.
- Apply Target Profit Margin & Define Terms: Apply your gross profit margin target (Price = Total Cost ÷ (1 – Margin %)), confirm quote expiration dates (typically 15–30 days due to steel price volatility), and specify change-order provisions.
Pro Tip: Always enforce a shop minimum. A walk-in job with 4 inches of weld still requires 30–45 minutes of intake, setup, machine grounding, safety checks, and invoicing. Quoting 4 inches at $8/inch yields $32—resulting in a net financial loss on the labor hour expended.
How to Measure Billable Weld Length Accurately
Start with the engineering drawing or the physical assembly and prepare an itemized joint schedule. Measure the actual seam path receiving weld metal, including wraparounds, returns, and both sides of double-fillet tee joints. Do not confuse root opening, bevel depth, or reinforcement height with linear seam length; joint geometry determines deposited weld volume and pass count, not linear seam distance.
Measuring Techniques for Different Joint Types
Use a standard steel rule or tape for straight linear joints, vernier calipers or fillet weld gauges for small brackets, and a flexible tailor’s tape or contour gauge for curved seams, pipe diameters, and rolled cones. On structural or heavy equipment repairs, grind back cracked metal to sound base material before establishing the final billable seam length.
For intermittent (stitch) welds, bill only the actual welded increments, but factor the additional cycle time (frequent starts, stops, crater fills, and repositioning) into the labor calculation. For circumferential pipe or tank welds, calculate length using true outer circumference ($C = \pi \times D$).
Joint Geometry vs. Estimating Impact
| Joint Parameter | Effect on Quoted Price |
|---|---|
| Seam Length (Linear Inches) | Establishes base torch travel distance. |
| Fillet Leg Size / Groove Depth | Increases weld metal volume quadratically; a 1/2″ fillet requires 4× the filler metal of a 1/4″ fillet. |
| Root Opening & Bevel Angle | Determines edge beveling labor, backing requirements, and root-pass heat control. |
| Welding Position (1F/1G to 4F/4G, 6G) | Out-of-position welds (vertical/overhead) reduce deposition rates and travel speeds by 30%–50%. |
| Surface Finish & Inspection (NDT) | Adds labor hours for flush grinding, dye penetrant (PT), magnetic particle (MT), or ultrasonic/radiographic testing (UT/RT). |
Accounting for Weld Passes
Count the passes defined by your WPS or shop standard. Pass count is determined by material thickness, joint design, position, heat-input limitations, and electrode diameter. A 3/8″ fillet weld is typically a 3-pass weld (root pass plus two fill/cover passes) in standard position, whereas a 3/16″ fillet is deposited in a single pass.
When tracking multipass welds, record total pass-inches internally for accurate arc-time estimates. For example, a 20-inch 3-pass joint represents 20 linear inches of finished product but 60 pass-inches of torch travel.
Safety & Code Warning: Never reduce fillet weld size, eliminate required passes, or skip preheat/interpass temperature controls to lower a bid. Critical structural, pressure, and lifting welds must strictly adhere to engineered drawings and qualified procedures.
When to Multiply Weld Inches by Three (Pass-Inches Explained)
Multiply linear seam length by three only when the welding procedure calls for a three-pass weld sequence (such as a root pass, fill pass, and cap pass) and you are calculating internal torch travel time. Never bill a customer for 3× the physical length of the assembly without clearly distinguishing pass-inches from seam length on the cost sheet.
Single-Pass vs. Multipass Estimating
| Joint Configuration | Pass Multiplier | Estimating Rule |
|---|---|---|
| Fillet welds ≤ 1/4″ (6mm) in flat/horizontal position | 1× Seam Length | Single pass. Estimate travel speed at 10–18 IPM depending on wire diameter. |
| Fillet welds 5/16″ to 1/2″ (8mm–12mm) | 3× Seam Length | 3-pass sequence. Include interpass deslagging/wire-brushing between passes. |
| Heavy groove welds (> 1/2″ plate with V-bevel) | Variable (4× to 10×+) | Do not use multipliers. Calculate deposited weld weight and use deposition rates (lbs/hr). |
What Arc-On Time & Operating Factor Mean for Weld Pricing
Arc-on time is the duration the electric arc is actively melting metal. Operating factor is the percentage of total paid shop time that the welder is actively triggering the arc. The ESAB Quick Weld Productivity Analyzer identifies operating factor and deposition rate as the primary drivers of total welding cost.
Standard Operating Factor Benchmarks by Process:
- SMAW (Stick): 15% – 25% (frequent electrode changes, stub loss, slag chipping)
- GTAW (TIG): 15% – 25% (manual rod feed, tight precision, back-purging)
- GMAW (MIG): 30% – 45% (continuous wire feed, minimal slag cleanup)
- FCAW (Flux-Cored): 30% – 50% (high deposition, fast travel, deslagging required)
- Automated / Submerged Arc (SAW): 60% – 80%+ (continuous mechanized carriage travel)
To convert linear inches into billable production time:
- Calculate Arc Time: $\text{Arc Minutes} = \frac{\text{Pass-Inches}}{\text{Travel Speed (Inches Per Minute)}}$
- Calculate Total Production Time: $\text{Production Minutes} = \frac{\text{Arc Minutes}}{\text{Operating Factor}}$
Example: A 36-inch MIG joint at 12 IPM requires 3 minutes of arc time. At a standard 30% operating factor ($3 \div 0.30$), the total production time required is 10 minutes. The remaining 7 minutes account for part positioning, cleaning spatter, checking dimensions, and gun maintenance.
How to Set a Real Loaded Labor & Shop Rate

A sustainable hourly rate covers far more than the welder’s gross wage. According to the U.S. Bureau of Labor Statistics Employer Costs for Employee Compensation data, employer-paid benefits and mandatory payroll taxes represent over 30% of total employer compensation costs across private industry. You must calculate a fully burdened labor rate and add facility overhead before establishing your billable rate.
Five-Step Shop Rate Formula
| Step | Cost Component | Example (Single Fabricator) |
|---|---|---|
| 1. Base Wage | Direct hourly pay | $32.00 / hour |
| 2. Labor Burden (30%–40%) | FICA, FUTA/SUTA, workers’ comp, health insurance, paid leave | +$11.20 / hour = $43.20 burdened wage |
| 3. Facility Overhead | Annual rent, utilities, insurance, depreciation ÷ Billable hours | +$35.00 / hour ($52,500 overhead ÷ 1,500 billable hrs) |
| 4. Total Cost-Based Rate | Break-even hourly cost to operate | $78.20 / hour |
| 5. Selling Shop Rate | Adjusted for 20% target profit margin ($78.20 ÷ 0.80) | $97.75 / hour (Billed at $95–$100/hr) |
Itemizing Costs in a Professional Weld Quote
Every estimate should track costs across distinct categories to ensure no hidden overhead erodes your margin:
1. Direct Labor Allocations
- Joint Preparation: Deburring, beveling, scale/rust removal, degreasing.
- Fit-Up & Tacking: Square alignment, clamping, gap spacing, bridge tacks.
- Welding & Interpass: Active arc time, preheat maintenance, deslagging.
- Finishing & Post-Weld: Spatter removal, flush grinding, inspection, crating.
2. Materials, Consumables, and Power
| Cost Component | Calculation Method |
|---|---|
| Filler Metal | Deposited volume × steel density (0.283 lb/in³) ÷ Deposition efficiency (MIG solid wire ~90%, FCAW ~85%, SMAW ~65%). |
| Shielding Gas | Flow rate (CFH) × (Arc hours + Preflow/Postflow allowances) × Cost per cubic foot + cylinder lease allocation. |
| Torch Consumables | Contact tips, nozzles, diffusers, liners, tungsten electrodes, and collets allocated per job or machine hour. |
| Abrasives & Chemicals | Cutoff wheels, flap discs, wire wheels, grinding stones, anti-spatter spray, and acetone. |
| Electrical Power | Welder input kW × Arc hours × Local electric utility kWh rate (or generator diesel consumption). |
Worked Example: Estimating a 24-Inch Single-Pass Fillet Weld
The following worked example illustrates how a shop calculates an equivalent per-inch rate from bottom-up costs. Assumptions: A 24-inch long, 1/4-inch fillet weld on mild steel in a shop setting using GMAW (MIG) with ER70S-6 wire and 75/25 Ar/CO₂ shielding gas. Expected travel speed: 10 IPM. Operating factor: 25%. Shop billing rate: $95/hour.
| Cost Component | Calculation & Details | Amount |
|---|---|---|
| Arc Time | 24 inches ÷ 10 inches/minute | 2.4 minutes |
| Production Welding Labor | 2.4 min ÷ 0.25 operating factor | 9.6 minutes |
| Material Handling & Fit-Up | Drawing review, joint cleaning, clamping, tacking | 42.0 minutes |
| Cleanup & Visual Inspection | Spatter scraping, wire wheel brushing, visual QA | 18.0 minutes |
| Total Direct Labor | 69.6 total minutes (1.16 hours) × $95/hour | $110.20 |
| Filler, Gas & Consumables | $18.50 wire + $5.50 gas (30 CFH) + $2.00 abrasives | $26.00 |
| Direct Cost Subtotal | Labor + Consumables ($110.20 + $26.00) | $136.20 |
| 10% Contingency Allowance | Risk allowance for fit-up variation | +$13.62 |
| Target Quote (20% Gross Margin) | $149.82 Total Cost ÷ (1 – 0.20) = $187.28 (Rounded) | $190.00 |
| Derived Equivalent Price Per Inch | $190.00 Total Quote ÷ 24 Linear Seam Inches | $7.92 / inch |
Takeaway: The resulting $7.92 per inch rate is valid only for this specific joint, material, and batch size. If the customer asks for 100 identical assemblies, setup and fixturing time drops per unit, reducing the equivalent inch price. If the job switches to sanitary stainless TIG, the rate could easily exceed $22.00 per inch.
When Linear Per-Inch Pricing Fails (Use Job-Based Quotes)
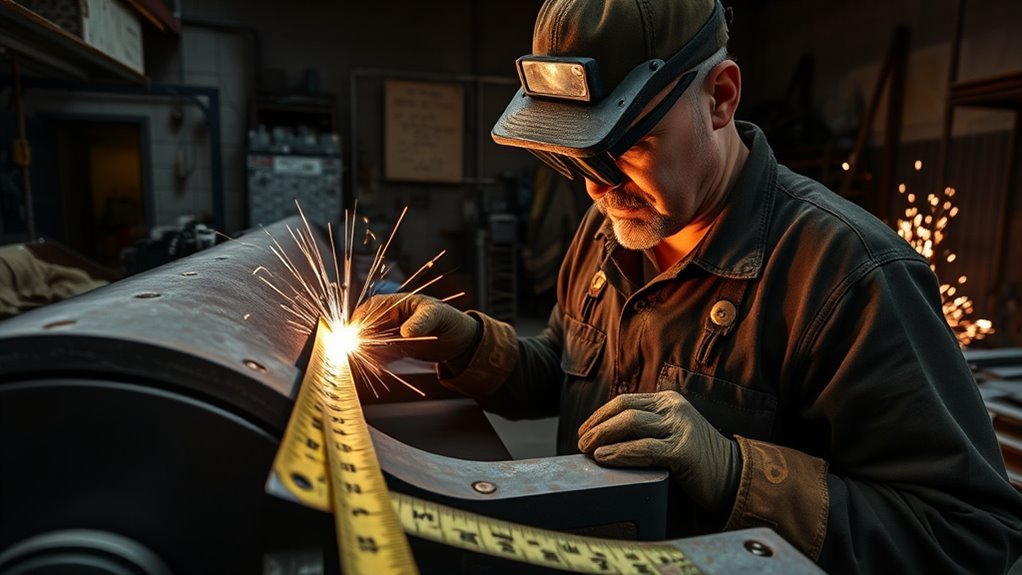
Linear inch pricing breaks down whenever non-welding variables dominate project costs. Switch to Time & Materials (T&M) or fixed-price job estimating in these six scenarios:
- Unknown Repair Scope: Cast iron repairs, cracked heavy equipment booms, or rusted marine hulls often reveal extensive subsurface fatigue upon gouging.
- High-Precision Sanitary or Aerospace TIG: Cleanroom piping and titanium fabrication require extensive back-purging, precision fixturing, and stringent visual/radiographic criteria where seam length is secondary to process control.
- Structural Code Compliance: AWS D1.1 or ASME Section IX projects require certified weld inspectors (CWIs), procedure qualification records (PQRs), welder performance qualifications (WPQs), and third-party NDT testing.
- Mobile Field Operations: Mobilization, site access permits, generator runtime, scaffold staging, and mandatory OSHA fire-watch requirements frequently exceed torch time.
- One-Off Custom Prototypes: Engineering design, CAD layout, template cutting, and specialized fixturing account for 80%+ of total project labor.
- Short, Complex Geometries: Assemblies with dozens of 1-inch gusset welds require extensive re-clamping and torch repositioning that invalidates linear travel math.
Safety Standards and Code Compliance
Estimates must always account for necessary safety controls and PPE. Welding operations generate hazardous fumes, ultraviolet (UV) radiation, high heat, and fire hazards. Comply with federal safety regulations set forth in OSHA 29 CFR 1910.252 (General Welding, Cutting, and Brazing Requirements), including local exhaust ventilation, personal protective equipment, and hot-work fire watch monitoring.
Never engineer or modify structural load-bearing welds or pressure vessel seams without approved engineering drawings, qualified procedures, and certified personnel.
Frequently Asked Questions
How do you calculate welding cost per inch?
To calculate welding cost per inch, estimate the full cost of the job first—including arc time, setup, fit-up, prep, cleanup, filler metal, shielding gas, overhead, risk, and target profit margin—then divide that total quote by the total billable seam inches.
How much should you charge per inch for welding?
There is no universal flat price per inch. Simple single-pass shop MIG fillets on mild steel often calculate to $5.00–$10.00 per inch, whereas multipass groove welds, out-of-position field welds, or sanitary stainless TIG jobs range from $15.00 to $35.00+ per inch once setup, gas, and labor burden are included.
What is the 3x rule in welding estimating?
The 3x rule refers to pass-inches: multiplying seam length by 3 when an approved weld procedure specifies a 3-pass sequence (root, fill, and cap). It tracks internal torch travel time and does not mean arbitrarily tripling the final price of the product.
Why should fabrication shops enforce a minimum job charge?
Small welding jobs require fixed non-welding labor (intake, consultation, machine setup, safety checks, invoicing, and cleanup). Without a shop minimum ($100–$175) or mobile minimum ($250–$450), billing a small 3-inch weld by the inch creates an automatic financial loss.
How much do welders charge per hour?
Shop rates typically range from $85 to $135 per billable hour for general welding and fabrication. Mobile service rigs, heavy equipment repair, and code-certified pressure pipe welding commonly bill between $120 and $200+ per hour plus travel and consumables.
Authoritative References
- American Welding Society (AWS) — Standard Welding Procedure Specifications — Technical guidance on procedure qualifications, joint designs, and essential variables.
- ESAB — Quick Weld Productivity Analyzer — Engineering formulas for deposition rates, duty cycles, and operating factors.
- Occupational Safety and Health Administration (OSHA) — 29 CFR 1910.252 — General industry hot-work safety, ventilation, and fire prevention mandates.
- U.S. Bureau of Labor Statistics — Employer Costs for Employee Compensation — Industry standards for burdened wages and mandatory employer benefits.
- Miller Electric — Weld Setting Calculators — Process parameter baselines for GMAW, GTAW, FCAW, and SMAW.