How to calculate welding cost per inch: add every cost the weld creates, then divide by the accepted weld length. There is no universal shop rate; the worked example below comes to about $0.70 per inch using sample inputs. It is a unit cost built from the weld size, total accepted weld length, filler metal, shielding gas, labor time, equipment, power, overhead, quality requirements, and project-specific allowances. A reliable estimate starts with a clear scope and shop-tested production data.
Quick Answer
To calculate welding cost per inch, add labor, filler metal, shielding gas, consumables, equipment, power, overhead, inspection, and job allowances. Divide that total by the accepted weld length. Use weld volume and density for deposited metal, deposition efficiency for purchased filler, and operating factor to convert arc time into paid labor time.
Key Takeaways
- Define the scope first: Decide whether the rate covers welding only or fully burdened fabrication.
- Measure weld metal, not just length: Joint area and weld length determine deposited volume and weight.
- Separate three productivity inputs: Travel speed, deposition efficiency, and operating factor measure different things.
- Use accepted weld inches: Put rework and scrap in the numerator instead of inflating the delivered length.
- Calibrate with shop data: Timed test welds, actual consumable use, and completed-job records are stronger than generic averages.
At a Glance
| Time Required | Depends on the job; longer for multi-process or code work |
| Difficulty | Moderate; requires basic geometry, unit conversion, and shop cost data |
| Tools Needed | Drawings, tape or calipers, calculator or spreadsheet, procedure data, supplier prices, and shop labor/overhead rates |
| Cost | No universal rate; the worked example below equals about $0.70 per inch using stated sample inputs |
Understanding the Components of Welding Cost
Break the estimate into measurable cost groups. This keeps fixed expenses separate from costs that rise with weld length.
- Direct labor: fitting, setup, tack welding, arc time, interpass work, cleaning, handling, and required paperwork.
- Materials and consumables: filler metal, shielding and purge gas, flux, contact tips, nozzles, tungsten, electrodes, grinding media, anti-spatter products, and other job supplies.
- Equipment and power: machine depreciation or rental, maintenance, wire feeders, positioners, fume extraction, generators, and electricity.
- Overhead: rent, insurance, supervision, administration, quality systems, utilities not charged directly, and shared safety costs.
- Project allowances: inspection, testing, mobilization, permits, taxes when applicable, scrap, rework, and contingency.
Define the scope before calculating. A direct welding cost may exclude base metal, cutting, forming, painting, and delivery. A fully burdened fabrication cost may include all of them. Label the estimate so the customer and estimator are using the same boundary.
Note: Cost per inch is useful for comparing similar welds. It becomes misleading when joint size, position, access, material, code level, or process changes.
Defining the Scope and Measuring Total Weld Length
List every joint before pricing. Record the weld symbol, joint type, size, length, quantity, position, material, process, number of passes, access limits, and quality requirements.
Measure butt, fillet, groove, plug, intermittent, and seal welds separately. For intermittent welds, count only the specified weld segments, but include starts, stops, and repositioning in labor. Use one unit system throughout the worksheet.
| Joint ID | Type and Size | Length × Quantity | Position / Access | Inspection |
|---|---|---|---|---|
| F1 | 1/4-in fillet | 36 in × 2 | Flat, open access | Visual |
Add the verified joint lengths to get the accepted weld length. If a rejected section is removed and rewelded, keep that extra labor and material in cost but do not count the rejected inch twice in the delivered-length denominator.
Selecting the Appropriate Welding Process
Material, thickness, joint geometry, position, access, environment, required mechanical properties, and appearance determine which process is suitable. Cost comes after the process meets the drawing, welding procedure, code, and service requirements.
- GTAW (TIG): useful where control, cleanliness, or appearance matters, but manual deposition is usually slower.
- GMAW (MIG): productive in controlled environments with suitable shielding-gas protection.
- FCAW: can provide high deposition rates; self-shielded and gas-shielded wires have different field and cost requirements.
- SMAW (stick): portable and flexible for repair or field work, with electrode-change, stub, slag-removal, and restart time.
- SAW and mechanized processes: strong candidates for long, repeatable welds that can be positioned and fixtured.
Record the qualified parameter range, expected travel or deposition rate, filler classification, shielding gas, preheat and interpass requirements, number of passes, and expected operating factor. The AWS Economics of Welding course and the applicable welding code can support process and cost planning.
Warning: Do not select a process only because its nominal cost per pound is low. Wind, access, position, procedure qualification, hydrogen control, preheat, and inspection can change both suitability and total cost.
Calculating Weld Metal Volume and Weight
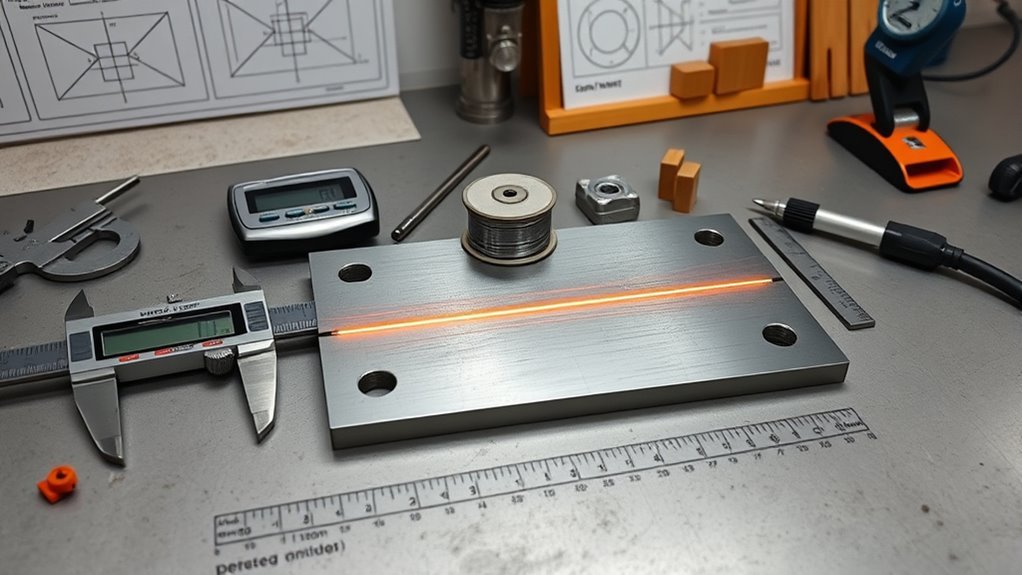
Start with the weld cross-sectional area. Then multiply by length:
Weld volume = Cross-sectional area × Weld length
Deposited weld weight = Weld volume × Filler-metal density
For an equal-leg theoretical fillet weld, the triangular area is approximately:
Area = Leg size² ÷ 2
Real welds may include root openings, reinforcement, convexity, penetration beyond the theoretical profile, or over-welding. Use the drawing, procedure, joint-preparation dimensions, or a verified weld-area calculator when those features matter.
Volume-to-Weight Example
If the cross-sectional area is 0.05 in² and the weld length is 14 in:
- Volume: 0.05 × 14 = 0.70 in³
- Approximate carbon-steel weight: 0.70 × 0.283 = 0.20 lb
This is a simple math example, not a quote for a specific joint.
Pro Tip: Use the density listed for the actual filler alloy or material specification. The common 0.283 lb/in³ steel value is an estimating approximation, not a universal density for every alloy.
Estimating Filler Metal and Shielding Gas Consumption
Filler-Metal Purchase Quantity
Deposition efficiency is the share of consumed filler that becomes deposited weld metal. It is not the same as deposition rate, travel speed, or operating factor.
Purchased filler weight = Deposited weld weight ÷ Deposition efficiency
Do not use one recovery factor for every manual process. Product and process data vary. For example, published values can be near 56–65% for some stick electrodes, around 79–85% for some self-shielded flux-cored wires, and 92–98% for metal-cored wire under specified spray-transfer conditions. Use the filler manufacturer’s data or a shop consumption test for the exact product and setup.
Shielding-Gas Consumption
Welding flowmeters normally show gas flow in cubic feet per hour (CFH) or liters per minute. Use the unit shown on the meter.
Gas used (ft³) = Flow rate (CFH) × Gas-on time (minutes) ÷ 60
If a value is truly in cubic feet per minute (CFM), multiply CFM directly by minutes. Do not divide by 60. Add preflow, postflow, purge gas, starts and stops, hose volume, and a measured waste or leak allowance where applicable.
Manufacturer starting ranges are not a substitute for the welding procedure. Excess flow can create turbulence and waste gas, while low flow or wind can reduce shielding. The ESAB Quick Weld Productivity Analyzer includes joint area, operating factor, wire consumption, gas flow, energy, and production-cost inputs.
Determining Labor Time and Labor Costs
Estimate arc time with either travel speed or deposition rate. Use the method supported by your procedure and shop data.
- Travel-speed method: Arc minutes = Total weld length ÷ Travel speed in inches per minute.
- Deposition-rate method: Arc hours = Deposited weld weight ÷ Net deposition rate in pounds per arc hour.
Then convert arc time into paid production time with the operating factor:
Operating factor = Arc-on time ÷ Total production time
Total production time = Arc-on time ÷ Operating factor
Operating factor includes the effect of fitting, positioning, electrode changes, interpass cleaning, grinding, handling, and normal arc-off work. It varies by process, fixture, part flow, position, and shop. Measure it with time studies or welding-data logs instead of applying one universal value.
Labor cost = Total production hours × Loaded labor rate
The loaded rate should come from the business and may include wage, payroll taxes, benefits, workers’ compensation, supervision, and other labor burdens. A generic hourly figure copied from another source is not reliable across regions, trades, union conditions, or years.
A small change in operating factor can affect total labor cost more than a modest change in filler-metal price.
Adding Equipment, Power, and Overhead Expenses
Assign equipment, power, and overhead with a consistent cost driver. Productive machine hours, paid labor hours, or accepted weld inches can work, but the denominator must match the way the expense is created.
Equipment Depreciation Costs
For straight-line depreciation, subtract expected residual value from purchase price and divide by useful life. Add planned maintenance, calibration, repairs, and accessories. Then divide by expected productive machine hours or weld inches.
Equipment rate per hour = Annual equipment cost ÷ Annual productive equipment hours
Equipment cost per inch = Equipment cost assigned to the job ÷ Accepted weld inches
| Item | Annual Cost | Per-Inch Charge |
|---|---|---|
| Purchase depreciation | $2,400 | $0.12 |
| Maintenance & repairs | $600 | $0.03 |
| Allocated overhead share | $1,200 | $0.06 |
| Total | $4,200 | $0.21 |
This table is valid only if the shop expects 20,000 billable inches for the period. State that denominator beside the calculation so the per-inch charge can be audited.
Power and Utilities
Use measured input power when available. Otherwise, use the machine manual or nameplate and a documented efficiency assumption.
Estimated input kW = Arc volts × Arc amps ÷ (1,000 × Machine efficiency)
Energy cost = Input kW × Arc hours × Electricity price per kWh
Add power used by fume extraction, positioners, ovens, chillers, air compressors, and other job-specific equipment when material. Machine duty cycle is a thermal rating at a stated output; it is not a generic discount factor for actual arc time or energy use.
Overhead Allocation
Choose a driver that reflects the work. Labor-hour overhead often fits manual fabrication. Machine-hour overhead can fit automated cells. A blended shop rate may be easier, but avoid charging the same expense in both the loaded labor rate and a separate overhead rate.
How to Calculate Welding Cost Per Inch: The Formula
After each category is calculated, use this complete formula:
Welding cost per inch = (Labor + Filler + Gas + Consumables + Equipment + Power + Overhead + Inspection + Mobilization + Rework allowance + Contingency) ÷ Accepted weld inches
Keep fixed charges visible. A minimum setup fee, mobilization charge, or inspection lot fee may be more honest as a separate line item than forcing it into a unit rate. You can still divide it by inches for internal comparison.
Recommended Worksheet Columns
- Joint ID, process, material, position, weld size, length, and quantity
- Cross-sectional area, volume, density, and deposited weight
- Deposition efficiency, purchased filler, unit price, and filler cost
- Travel speed or deposition rate, arc time, operating factor, and labor hours
- Gas flow, gas-on time, waste allowance, and gas cost
- Equipment, power, overhead, inspection, rework, and contingency
- Total cost, accepted inches, and final cost per inch
Worked Example: 1/4-Inch GMAW Fillet Weld
This example prices two 36-inch, equal-leg 1/4-inch fillet welds in the flat position. It excludes base metal, cutting, coating, freight, and profit. Every rate below is illustrative and should be replaced by actual shop data.
| Input | Sample Value | Calculation |
|---|---|---|
| Accepted weld length | 72 in | 36 in × 2 |
| Theoretical fillet area | 0.03125 in² | 0.25² ÷ 2 |
| Weld volume | 2.25 in³ | 0.03125 × 72 |
| Deposited steel weight | 0.637 lb | 2.25 × 0.283 |
| Purchased wire | 0.708 lb | 0.637 ÷ 90% efficiency |
| Arc time | 0.12 hr | 72 ÷ 10 ipm ÷ 60 |
| Paid production time | 0.40 hr | 0.12 ÷ 30% operating factor |
| Gas use | 4.14 ft³ | 30 CFH × 0.12 hr × 1.15 allowance |
| Cost Item | Sample Rate | Cost |
|---|---|---|
| Loaded labor | $65.00/hr × 0.40 hr | $26.00 |
| Wire | $4.00/lb × 0.708 lb | $2.83 |
| Shielding gas | $0.06/ft³ × 4.14 ft³ | $0.25 |
| Small consumables | Job allowance | $0.50 |
| Equipment | $8.00/hr × 0.40 hr | $3.20 |
| Overhead | $18.00/hr × 0.40 hr | $7.20 |
| Setup and visual inspection | Job allowance | $6.00 |
| Subtotal | Before contingency | $45.98 |
| Contingency | 10% | $4.60 |
| Total | $50.58 ÷ 72 in | $0.70/in |
This result is not a market benchmark. A smaller job can cost much more per inch because setup, inspection, and mobilization are spread over fewer inches. Out-of-position, multi-pass, alloy, preheated, restricted-access, or code welds can also cost far more.
Practical Tips, Examples, and Common Pitfalls
- Prevent over-welding: Extra fillet leg size adds weld volume, filler, heat, time, and distortion.
- Keep fixed and variable costs separate: Setup and mobilization do not disappear when weld length is short.
- Use contingency only when justified: Base it on drawing maturity, access, quantity risk, and historical variance.
- Benchmark against similar jobs: If an old average was $0.75/in and a new estimate is $0.60/in, check weld size, prep, operating factor, and scope before assuming an improvement.
- Build scenarios: Compare best, expected, and worst cases for operating factor, rework, material price, and inspection.
- Do not double-count burden: Check whether supervision, payroll burden, electricity, and maintenance already sit inside another shop rate.
- Track estimate versus actual: Close the loop after each job and update travel speed, arc factor, filler recovery, gas use, and rework assumptions.
- Price profit separately: Cost per inch is not the same as selling price per inch.
Pro Tip: Time one qualified, representative test joint and weigh or record the actual filler used. That one controlled study can improve both labor and consumable estimates.
Include Safety, Procedure, and Quality Costs
Safety and quality are part of the job cost, not optional overhead to ignore. Include ventilation or fume extraction, screens, fire watch, gas-cylinder handling, required PPE, confined-space controls, permits, procedure qualification, welder qualification, preheat monitoring, consumable storage, inspection, and documentation when the scope requires them.
OSHA identifies welding hazards that include fumes, ultraviolet radiation, burns, eye injury, electrical shock, and other physical hazards. Follow the applicable federal, state, local, site, and employer requirements, plus the governing welding code and approved procedure.
Warning: This costing method does not replace a welding procedure, engineering review, code requirement, hazard assessment, or qualified inspection plan.
Frequently Asked Questions
How do taxes affect welding cost per inch?
Tax treatment depends on the jurisdiction, contract, customer, and whether the charge is for materials, fabrication, repair, installation, or another service. Do not apply one blanket percentage to labor and materials. Confirm the treatment with current local rules or a tax professional, then add the applicable amount before calculating the selling price or allocated unit cost.
Can subcontractor rates be used in the calculation?
Yes. Keep a subcontractor’s fixed mobilization, minimum charge, inspection, and per-unit charges visible. For comparison, divide the complete subcontract price by accepted weld inches, but do not assume the quote has the same scope as an internal shop rate.
How should inspection and testing costs be included?
Add inspector time, NDT vendor charges, consumables, equipment, reports, hold points, and expected repair or retest costs. A project-wide inspection fee can be shown separately or allocated across accepted weld inches for internal comparison.
Should scrap and rework be included per weld inch?
Yes. Use historical defect, repair, and scrap data for comparable work. Put the expected extra labor, filler, gas, inspection, and schedule cost in the numerator, then divide by the accepted inches delivered to the customer.
How should travel and mobilization be priced per inch?
Add travel time, mileage, freight, lodging, per diem, site access, setup, permits, and demobilization. Keep them as fixed line items in the quote when possible. Divide by estimated accepted inches only when a unit-cost comparison is needed.
Should base metal be included in welding cost per inch?
Include base metal only when the estimate is meant to cover fabrication material. For a welding-operation rate, exclude it and state that clearly. Cutting loss, forming, machining, and coating should also be identified separately unless the scope says they are included.
Is there a standard welding cost per inch?
No. Weld size, process, material, position, access, quantity, procedure, labor market, inspection, and fixed setup costs can change the result sharply. Use a stated worked example or shop history instead of presenting one universal rate.
Related guides: see typical prices by metal and method in our welding cost per inch price guide, the weld estimating guide for quoting by the inch, and the process-specific methods for MIG and TIG welding.
Conclusion
A defensible welding cost per inch starts with a defined scope and accepted weld length. Calculate weld volume and deposited weight, adjust filler purchases for the exact process efficiency, estimate gas in the correct units, convert arc time into paid labor time, and add equipment, power, overhead, safety, inspection, rework, and project allowances. Then compare the estimate with actual shop results and update the inputs after every job.
Sources
- American Welding Society — Economics of Welding — welding-economics training and process-cost planning.
- ESAB Quick Weld Productivity Analyzer — joint area, operating factor, wire, gas, energy, and production-cost inputs.
- ESAB — Understanding the Difference Between Flow and Pressure — CFH and LPM flow units.
- ESAB — Metal-Cored Wire Deposition Efficiency — definition and process-specific efficiency data.
- OSHA — Welding, Cutting, and Brazing Standards — applicable safety and health standards.
- OSHA — Welding Hazards and Solutions — fumes, radiation, burns, shock, and protective controls.