

You total labor, materials, equipment, overhead, and profit. Start by measuring weld geometry to get cross-sectional area and volume (V = A×L). Then convert volume to filler weight using density and a recovery factor. Calculate arc time from travel speed. Apply an operating factor to get productive hours, and multiply by loaded labor rates. Add consumables, gas, power, and equipment costs. Apply overhead percentage and markup to hit your target margin. Keep going, and you’ll find step-by-step examples and templates.
Quick Answer
- Break down costs into labor, materials, equipment, and overhead for accurate estimates.
- Measure weld geometry to calculate volume, then convert to weight with density and recovery factors.
- Estimate arc time using travel speed and deposition rates, adjust with operating factors, and multiply by labor rates.
- Add power, gas, and equipment expenses based on usage and local rates.
- Apply overhead (10-30%) and profit margins (10-20%) to the total for a competitive bid.
- Use templates and tools to standardize and refine your process over time.
Why Accurate Welding Cost Estimation Matters

When you underquote a welding job, you cut into profit margins. When you overquote, you risk losing bids. Precise cost estimation keeps your business viable and competitive.
You need cost accuracy because it shapes your financial impact. An error shifts profitability and decision-making.
Approach estimates methodically. Use documented rates for labor, verified material unit costs, and calibrated equipment depreciation to minimize variation.
Don’t guess allowances. Calculate them from historical data and current quotes.
Use a standardized worksheet so every estimator applies the same assumptions. You can trace discrepancies this way.
Run sensitivity checks on key variables. See how small changes affect margins and bid viability.
Maintain a short list of verified suppliers and real-world productivity rates. This reduces surprises.
Finally, record actual versus estimated outcomes after each job. Refine your assumptions this way. Continuous feedback closes the loop between projected costs and realized financial impact. It improves future cost accuracy.
Identifying All Cost Components

Accurate bids depend on knowing every expense. Start by breaking the job into its component costs: labor (wages, benefits, and workforce overhead), materials (base metal, filler, shielding gas, and consumables), equipment (depreciation, rentals, maintenance, and power), and general overhead (utilities, rent, admin, and safety gear). Tally each element separately. You can apply unit rates and productivity factors. Then reconcile them to the simple Total Cost = Labor + Consumables + Power + Base Material formula for a thorough estimate.
You’ll create a clear cost breakdown that groups expense categories. This makes hidden charges visible. List labor as hourly rates plus benefits and allocated workforce overhead. Itemize materials by type and quantity: base metal, filler, shielding gas, consumables. Record equipment costs as allocated depreciation, rental days, upkeep, and electricity.
Capture overhead: utilities, facility rent, admin, safety gear, allocated per job. Use spreadsheets or templates to combine unit prices with projected usage and productivity factors. Then sum the expense categories to produce a defensible, auditable welding cost estimate. For best practices, check resources from the American Welding Society (AWS).
Products Worth Considering

Set includes:8pcs Back cup, 20 collets, 20pcs collet body, 20pcs Alumina gas cup/ nozzle.

Fit 15AK MB15 MIG MAG Co2 Welding Torch Consumables 100% Material: Copper
Measuring Weld Geometry and Calculating Weld Metal Volume

You have broken down labor, materials, equipment, and overhead. Now measure the weld geometry so you can convert those material estimates into exact quantities.
You’ll determine cross-sectional area from the joint type: rectangular, triangular, or parabolic. Use precise dimensions from drawings or shop measurements.
Apply the core volume calculation: V = A × L, where L is total weld length. Verify measurements and round conservatively for fillets or irregular profiles.
Use V = A × L to compute weld volume; verify dimensions and round up for fillets or irregular profiles.
- Identify joint type and model the cross-section shape accurately (rectangular, triangular, parabolic).
- Measure or extract cross-section dimensions; compute area using appropriate geometric formula.
- Multiply area by total weld length to get volume (example: 2.47 in² × 14 in = 34.58 in³).
- Record volume per weld and sum for the assembly; use consistent units and document assumptions.
Be methodical: note tolerances, inspect fit-up, and flag any complex profiles for scaled measurement before finalizing volume calculation.
Converting Volume to Weight and Determining Consumable Requirements

You have confirmed total weld volume. Convert it to weight by multiplying that volume (in in³) by the base material density (lb/in³) to get the net weld metal weight. Then adjust that net weight with a recovery factor to account for spatter, burn-off, and other process losses so you can size the required filler metal. Use Weight = Volume × Density to get volume weight. Then multiply by the recovery factor (typically 1.05–1.25) to find total consumable needed.
| Step | Action |
|---|---|
| 1 | Calculate weld volume from joint geometry |
| 2 | Multiply volume (in³) × density (lb/in³) = net weight |
| 3 | Apply recovery factor to net weight = filler required |
| 4 | Add allowance for scrap/spare and track consumption |
Also consider deposition rate and wire feed consumption to reconcile theoretical filler needs with actual usage. Track wire consumption and energy per product to refine the recovery factor over time. Keep consumable ordering accurate and cost-effective.
Products Worth Considering

PATENT PENDING - The Perfect Welder’s Tool: Looking for a way of keeping your fingers protected without having to compromise on your welding quality? Would you like to maximize your welding performance and increase accuracy? The Clarke Brothers wire welder is the ultimate tool!

ER4043 TIG WELDING ROD: ER4043 is a 5% silicon -containing aluminum and silicon alloy welding rod. It has high silicon content, good liquidity, and strong heat resistance

Estimating Welding Time and Labor Costs

First calculate the arc time by dividing the weld joint length by the welder’s travel speed to get total welding hours.
Then apply the operating factor (typically 20–40%) to convert arc time into actual productive time per shift.
Finally, multiply the adjusted hours by the welder’s loaded hourly rate (wage plus taxes, benefits and overhead) to get the labor cost.
Products Worth Considering
![ARCCAPTAIN Stick Welder, [Large LED Display] 200A ARC/Lift TIG Welding Machine with Synergic Control, IGBT Inverter 110V/220V Portable MMA Welder Machine with Hot Start, Arc force and Anti-Stick](https://m.media-amazon.com/images/I/41UxHUozfeL._SL500_.jpg)
【EASY TO USE】Intelligent LED screen design, provides you with accurate data display and more choices, helps you read it easier and more clearly without taking off your helmet. Good performance on 6010, 6011, 6013 and 7018 rods. It's very suitable for outdoor maintenance, garage, farm, craft, and home DIY. Note: DO NOT power on until the screen turns off and the fan stops working!

Be certain with your calculations with Double Check Function
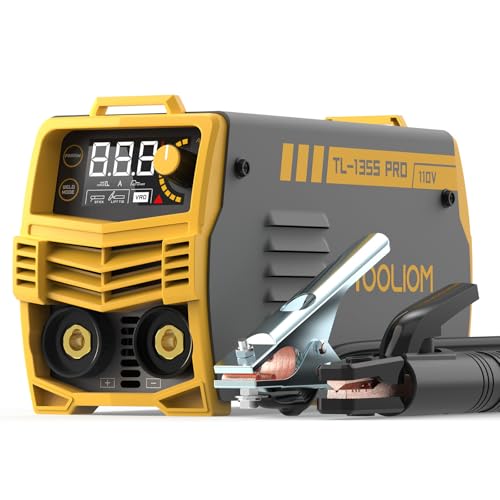
Can handle 6011/6013 electrode, adopting IGBT Inverter power system, suitable for mild steel, cast iron, stainless steel as well as hard surfacing.
Calculate Arc Time
How do you turn weld weight and deposition rate into a reliable time estimate? You start by measuring the weight of the weld and identifying the deposition rate for your welding techniques. Then apply the standard formula and account for efficiency improvements.
- Calculate weld weight (lb) precisely. Include all beads and joints.
- Use the deposition rate (lb/hr) from procedure data for the chosen welding techniques.
- Compute arc-on time: Arc-on Time = Weight of Weld ÷ Deposition Rate. Then compute total labor time: Total Time = Arc-on Time ÷ Operating Factor.
- Example: Arc-on = 14.6 lb ÷ 7.8 lb/hr ≈ 1.87 hr; with OF = 0.30 → Total labor time ≈ 1.87 ÷ 0.30 = 6.24 hr.
Accurate arc time feeds directly into labor costing. Be methodical and document assumptions.
Determine Operating Factor
The operating factor directly ties arc-on time to total shift time. Calculate it early to gauge real productivity and labor cost impact.
To determine the operating factor, divide measured arc-on time by the total shift time. This gives a clear ratio you can use in efficiency metrics. Record realistic arc-on times. Welders commonly hit 20%–40%. Log non-welding activities (setup, inspection, breaks).
For example, if arc time is 4.11 hours in an 8-hour shift, compute OF = 4.11 / 8. Track OF across jobs to spot variation and root causes: skill gaps, tooling delays, or poor sequencing.
Use the operating factor to prioritize process improvements that raise utilization. This lowers labor hours and improves repeatable cost estimates.
Convert Arc Time to Cost
You have established the operating factor. Convert arc-on time into a dollar figure by calculating total arc time from weld weight and deposition rate. Then apply your labor rate and efficiency adjustment.
You’ll compute arc time (weld weight ÷ deposition rate). Adjust by the operating factor to reflect welding efficiency. Multiply by realistic labor rates to get labor cost.
- Calculate arc time: 9.62 lb ÷ 7.8 lb/hr = ~1.23 hr.
- Apply operating factor: adjusted time = arc time ÷ OF (e.g., 0.20–0.40).
- Multiply adjusted time by labor rates ($55–$60/hr) for labor cost.
- Add material and power costs to obtain total welding cost.
Calculating Power, Gas, and Equipment Expenses

Break down welding expenses into power, gas, and equipment components. You can precisely track the inputs that drive cost and spot where savings are possible.
Start by calculating power consumption. Multiply the machine voltage (V) by amperage (A) and by arc-on time (hours) to get watt-hours. Account for machine efficiency and power factor if using input-side measurements. Convert to kWh. Then multiply by the local utility rate to get total power cost.
For gas pricing, record the total shielding gas volume used. Multiply by your supplier’s unit price. Remember gas use varies with process and transfer mode (e.g., flow rate in CFH × arc-on time in hours).
For equipment expenses, tally depreciation, rental fees, scheduled maintenance, and any machine energy used during cycle time beyond arc-on.
Keep detailed cycle-time and arc-on-time logs per job. You can allocate power and equipment costs accurately.
Use specific local rates for electricity and gas. Update equipment cost factors periodically to keep your per-job estimates precise and actionable.
Products Worth Considering
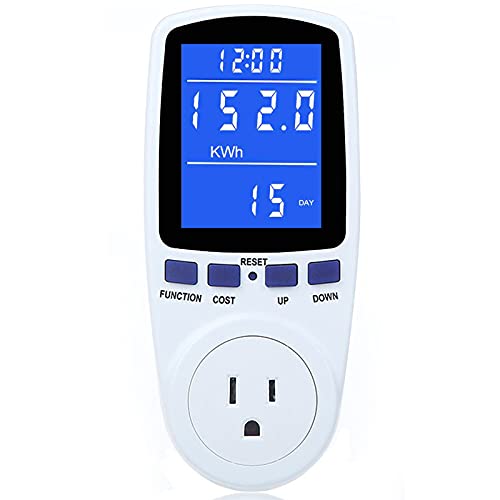
Various Monitoring Parameters: The power meter plug can monitor the power (W), energy (kWh), volts, amps, hertz, power factor, cost, minimum and maximum power (W), cumulative days and time of your appliances. By switching 7 display modes, you can easily know the various parameters while the appliance is working. The home energy monitor can also calculate and display how much power your appliance uses and how much electricity bill it cost in cumulative time

Various Monitoring Parameters: The power energy meter can monitor the power (W), energy (kWh), volts, amps, hertz, power factor, cost, minimum and maximum power (W), cumulative days and time of your appliances. By switching 7 display modes, you can easily know the various parameters while the appliance is working. The home energy monitor can also calculate and display how much power your appliance uses and how much electricity bill it cost in cumulative time

✓ Backlit LCD Display: The watt meter features an upgraded backlit LCD display with a 160° wide viewing angle, providing clear and distinct data readings from any angle, day or night. (Note: To conserve energy, the backlight will automatically turn off after 15 seconds of continuous use.)
Applying Overhead, Operating Factors, and Profit Margins

Translate raw costs into billable rates. Calculate an overhead rate that captures utilities, rent, admin, safety gear and other shop expenses. Typically add 10–30% to labor.
Then apply an operating factor (arc time divided by shift time) to adjust for realistic productive hours. Usually 20–40% for welders. Use labor rates that include taxes and benefits (around $55–60/hr).
Finally, set a profit margin, commonly 10–20% of the total estimated cost. This guarantees competitiveness while preserving profitability.
Calculating Overhead Rates
Overhead often hides behind labor and materials. You can’t leave it out of a welding estimate if you want accurate pricing. Calculate it by totaling all indirect costs: utilities, rent, insurance, administrative wages, tooling depreciation, and similar expenses. Divide that sum by your total direct labor costs to produce an overhead percentage you’ll apply to labor estimates.
Use that percentage for overhead allocation so indirect expenses are recovered reliably.
- List every indirect expense for the period (monthly/annual).
- Sum indirect expenses and confirm exclusions (direct materials, subcontractor labor).
- Divide by total direct labor cost to get the overhead rate (%).
- Apply this rate to labor in estimates, then add profit margin per project.
Applying Operating Factors
Arc time only captures the hands-on welding minutes. Apply an operating factor to convert that into total shift time so your labor and equipment costs aren’t understated. Use operating factors (typical 20–40%) as efficiency metrics. Divide arc time by shift time to get OF. Then inflate labor hours accordingly. Add overhead (utilities, rent, admin) to produce a realistic labor rate, often $55–$60/hr. Estimate arc time from weld weight and deposition rate. Apply OF. Then multiply by total hourly burden. Finally, include profit separately (handled in the next section). Be methodical: document assumptions, show calculations, and run sensitivity checks for different OF values.
| Reality | Responsibility |
|---|---|
| 20% OF | Tight schedule |
| 40% OF | Lean operation |
Setting Profit Margins
When you set profit margins, start by adding every cost element: labor (with payroll burdens), materials, and overhead. Your markup rests on a complete, auditable base. Apply the operating factor to convert arc time into realistic shift hours. Roll that into your loaded labor rate. Then calculate a markup (commonly 10–30%) on the summed total to reach a target margin.
You’ll include utilities, rent, admin and payroll burdens (20–30%) to get true unit cost. Use industry markup guidance but adjust for risk, capacity, and market position. Keep records and update margins from real project data to preserve profitability and competitive pricing.
- Calculate total direct and indirect costs precisely.
- Apply OF to derive productive hours.
- Add a 10–30% markup per profit margin strategies.
- Review margins against market trends quarterly.
Tools, Templates, and Worked Examples

If you want fast, repeatable welding estimates, start by using purpose-built tools and templates. They force you to enter precise weld dimensions, filler metal specs, joint types, and productivity rates.
Use welding software alongside downloadable cost templates and spreadsheets. Separate worksheets for fillet, groove, and specialty joints. Enter measured lengths, sizes, and filler metal consumption. The sheet immediately returns weld metal weight, travel speed, and deposition time.
Rely on automated estimating systems to speed work. Validate outputs against specialized tools and your shop’s historical data. For each example, show line-item calculations: labor hours (based on travel speed and prep), material weight and cost, consumables, and power usage. You can try Lincoln Electric’s weld cost calculator for quick checks.
Record assumptions and source data so you can reuse or adjust templates. Work through at least one full example from a past project to compare predicted versus actual costs. Then refine productivity rates and markup rules in your cost templates for future accuracy.
Worked Example
Consider a fillet weld with cross-sectional area of 2.47 in² and length of 14 in. Volume = 2.47 × 14 = 34.58 in³. Using steel density of 0.283 lb/in³, net weight = 34.58 × 0.283 ≈ 9.79 lb. Apply recovery factor of 1.1: filler needed ≈ 10.77 lb.
For time, deposition rate = 7.8 lb/hr, arc time = 9.79 / 7.8 ≈ 1.26 hr. With operating factor of 0.3, total labor time ≈ 1.26 / 0.3 = 4.2 hr. At $55/hr, labor cost = 4.2 × 55 = $231.
Add materials ($50), power/gas ($20), overhead (20% of labor = $46.2), and 15% profit: total ≈ $231 + $50 + $20 + $46.2 + (15% of $347.2 ≈ $52) = $399.2.
Common Mistakes to Avoid
People often skip detailed weld measurements. This leads to wrong volume and higher material costs than expected.
Another issue is ignoring the recovery factor. You end up short on filler metal and face delays.
Underestimating operating factors is common. It makes labor hours look too low and cuts into profits.
Forgetting to update local rates for power or gas can throw off estimates. Always check current prices.
Finally, not recording actual costs versus estimates means you miss chances to improve. Track everything to refine your process.
Frequently Asked Questions
How Do You Price Rush or Expedited Welding Jobs?
You charge rush pricing by adding a defined expedited service premium (percentage or flat fee), document faster labor, overtime, materials priority, and resource reallocation, then communicate clear terms, deadlines, guarantees, and adjust quote templates accordingly.
What Adjustments Apply for Highly Skilled Welders?
Ye olde craftsmen’s premium applies: you’ll raise labor rates for higher skill level, add certification and inspection fees, factor slower but precise hours, include lower rework risk discounts, and estimate premium for scarce specialist availability.
How to Account for Post-Weld Inspections and NDT Costs?
You’ll include post weld inspection and NDT procedures as line items: estimate technician hours, equipment rental, consumables, setup and reporting time, plus contingency for rework; multiply by hourly rates and allocate proportionally per weld or project.
When Should Subcontracting Specialized Welding Be Used?
You should subcontract specialized welding when you lack specialized equipment, certified skills, or capacity, or when project timelines demand faster delivery; it’s practical to document qualifications, cost implications, and inspection responsibilities before awarding the subcontract.
How to Estimate Costs for Complex Fixture and Fixturing Needs?
Think of fixture design as building a bridge: you’ll list cost factors, prototype, labor, materials, tooling hours, and tolerances, then estimate machining, setup, testing, and iteration costs, adding contingency and subcontractor rates for complexity.
Conclusion
You’ve followed each step methodically. By coincidence the 1% tweak you made to weld volume reduced both consumable use and labor by the same small amount. This proves small measurements matter. Keep identifying components, convert volume to weight, time the work, and add power, gas, overhead, and profit. Stick to templates and check calculations. Being precise lets you quote competitively, control costs, and repeat accurate estimates every time.
