

What’s in This Article
- Understanding Projection Welding and When to Use It
- Before You Begin Projection Welding Costing
- Step-by-Step Projection Welding Cost Calculation
- Identifying All Cost Components
- Calculating Material and Consumable Costs
- Estimating Labor Time and Labor Rate
- Determining Machine, Power, and Equipment Expenses
- Adding Overhead, Waste Allowances, and Profit Margin
- Worked Example: Projection Welding Cost Per Part
- Common Mistakes That Distort Projection Welding Costs
- Frequently Asked Questions
- Conclusion
One missed input can turn a profitable projection welding quote into a loss. To price the job well, you need to split the work into measurable cost items and turn each one into a per-weld or per-part value. This guide shows you how to calculate material, consumable, labor, machine, power, overhead, waste, and margin costs in a clear way.
Quick Answer
To calculate projection welding cost, add your direct material, consumable, labor, machine, power, maintenance, fixture, overhead, waste, and profit costs. Convert each input to a per-weld or per-part value. Then test the quote against changes in cycle time, scrap, labor rate, and material price before you submit it.
Key Takeaways
- Start with measurable inputs, not rough guesses.
- Separate direct costs from overhead, waste, and profit.
- Track setup time, weld time, inspection time, and downtime.
- Use real shop data to improve each future quote.
- Run sensitivity checks before you lock in the final price.
Understanding Projection Welding and When to Use It

Projection welding uses small raised areas, called projections, to focus current and pressure at the joint. These projections create localized heat, so the weld forms at controlled points instead of across the full part surface.
You can use this process for thin sheet metal, coated parts, fasteners, and multi-point joins. It works well when you need repeatable welds, short cycle times, and consistent joint strength.
Projection design matters because it controls contact pressure and current density. A poor projection shape can cause weak welds, excess indentation, or part distortion.
Design projections to control contact pressure and current density for repeatable fusion with less warping.
Common projection welding uses include nut welding, bolt welding, bracket attachment, and automotive assembly. The process often makes sense when one machine cycle can create several weld points.
Before You Begin Projection Welding Costing
Collect the job details before you build the cost model. Your estimate will only be as accurate as the inputs you use.
Estimated time to build a basic quote: 30 to 90 minutes, depending on part complexity and available shop data.
- Part drawings, material type, thickness, and coating details
- Number of welds per part and parts per batch
- Machine rating, weld schedule, and expected cycle time
- Fixture, electrode, and inspection requirements
- Loaded labor rate, overhead method, and target margin
Note: Use your own shop records where possible, because generic cost ranges can miss local labor, power, scrap, and overhead differences.
Products Worth Considering

Professional Ggs Flow Tester / Meter Peashooter Style
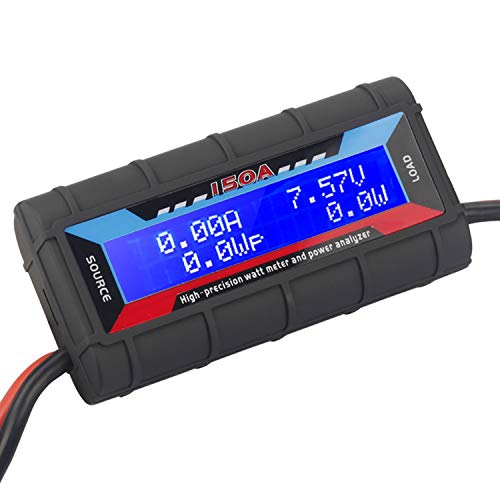
Bright blue backlit LCD display, easy reading. 12 gauge wire take higher volt and current. It is indispensable for analyzing, testing and troubleshooting any DIY DC power project. Very accurate in giving DC volt, ampere and wattage

Simple to Read: each watt meter power analyzer is designed with a bright blue backlit LCD display for your reading convenience, allowing you to see the above data clearly in the dark, or even in the sun and other places
Step-by-Step Projection Welding Cost Calculation
Use the same costing sequence for each job. A repeatable method helps you compare quotes and find weak assumptions.
- Define the weld unit. Decide if you will price per weld, per part, per batch, or per assembly.
- List material inputs. Record base metal, fasteners, coatings, surface prep, and any filler or inserts.
- Estimate consumables. Include electrode wear, dressing, cleaning supplies, personal protective equipment, and quality test items.
- Measure labor time. Break the job into setup, loading, welding, unloading, inspection, and rework time.
- Apply the loaded labor rate. Use wages plus benefits, payroll costs, supervision, and shop burden where your accounting method requires it.
- Add machine and power costs. Allocate depreciation, maintenance, fixtures, tooling, and energy use to the weld unit.
- Add overhead and waste. Apply your chosen overhead rate, scrap factor, rework allowance, and yield loss.
- Add profit margin. Apply your target margin after you calculate the full estimated cost.
- Run sensitivity checks. Test how the unit cost changes when cycle time, scrap, material price, or labor rate moves.
Identifying All Cost Components
You need a clear cost breakdown before you can price a projection welding job with confidence. Separate each cost item so you can see what drives the final number.
Start with direct costs, such as labor, materials, consumables, power, inspection, and rework. Then add indirect costs, such as maintenance, depreciation, facility expenses, supervision, and administration.
Use a loaded labor rate from your own payroll and accounting records. This rate should include wages and any labor burden your shop uses for quoting.
Count consumables per weld cycle or per batch. Include electrode wear, electrode dressing, cleaning supplies, test coupons, and safety items that the job consumes.
Calculate power use from machine draw and cycle time. Then apply your local energy rate and adjust the estimate when measured energy data becomes available.
Track each input with timestamps, quantities, unit costs, and assumptions. Good records make future quotes more accurate and easier to audit.
Products Worth Considering

Richard Finch, Welder's Handbook: A Complete Guide to MIG, TIG, Arc & Oxyacetylene Welding, "Completely Revised and Updated Edition!" paperback
Calculating Material and Consumable Costs
Material and consumable costs can change the quote more than many shops expect. Start with base metal weight, fastener cost, coating requirements, and any surface preparation the joint needs.
Use this simple formula for base material: material cost = part weight × unit material price. Add fasteners, inserts, washers, plating removal, cleaning, and any special handling cost.
Estimate consumables by spreading each item over its expected useful life. For example, divide electrode cost by expected welds per electrode set to get electrode cost per weld.
Include expected waste and yield loss. Scrap, rejected parts, destructive testing, and startup samples all belong in the model.
- Track actual material use after each job.
- Update supplier prices before quoting repeat work.
- Separate setup scrap from production scrap.
- Compare estimated consumption with real usage.
Pro tip: Build one spreadsheet tab for assumptions and one tab for actual job results, so each completed run improves the next quote.
Products Worth Considering

SOLVE ALL YOUR DIMENSIONAL MATH quickly and accurately with the award-winning CM Pro construction calculator’s powerful built-in solutions for completing layouts, plans, bids, estimates and more, directly in the building units you prefer

MACHINIST-SPECIFIC KEYS: Enter details for the job quickly and effectively without tedious and error-prone long hand calculations; The dedicated function keys let you scroll through the results to solve your speed and feed calculations for face, end or slot milling plus turning, drilling and boring

200+ Engineer Functions: For Mixed Dimension Calculations and Conversions,Area & Volume,Brick and Block,Concrete, Boards, Flooring, and Wall Stud,Drywall Sheet Count,Circle Area, Circumference, and Arc Properties,Compound Miter,Polygon Tiling,Roofing Material,Foundation Correction,Right Angle and Rafter,Roof Pitch and Angle Conversions,Common Rafter Length,Common/Hip/Jack Rafter and Spacing,Stair Layout,Rake Wall Calculations
Estimating Labor Time and Labor Rate

Joint complexity and weld count drive both setup time and cycle time. Break the job into repeatable work steps before you assign labor cost.
Measure setup, fixture changes, part loading, weld time, unloading, inspection, electrode dressing, and packaging. This gives you a clearer labor estimate than one blended guess.
Separate weld time from support work. A machine may weld quickly, but the operator may spend more time loading parts, checking alignment, or handling rejects.
Convert setup and production time into labor-hours. Then multiply those hours by your loaded labor rate.
Use historical data from similar jobs when you have it. If you don’t, run a short trial and time the operation before quoting a large batch.
Determining Machine, Power, and Equipment Expenses
Machine, power, and equipment expenses include both fixed and variable costs. You need to allocate them fairly to each weld, part, or batch.
Start with machine depreciation, then add power, maintenance, fixtures, tooling, cooling, and inspection equipment. Treat one-time tooling costs separately if the customer pays for dedicated fixtures.
Use measured data when possible. Nameplate power can help with a first estimate, but real use changes with weld schedule, duty cycle, and production flow.
Machine Depreciation Rate
Machine depreciation shows how much equipment value you assign to each production hour or weld. A simple straight-line method uses purchase price, salvage value, and useful life.
Use this formula: annual depreciation = (purchase price − salvage value) ÷ useful life. Then divide annual depreciation by expected production hours to estimate depreciation per machine hour.
You can also allocate depreciation per weld if your machine runs stable, high-volume work. For mixed jobs, an hourly allocation often gives a cleaner quote.
- Use the same depreciation method across similar quotes.
- Separate depreciation from maintenance and repair costs.
- Update machine-hour estimates when utilization changes.
- Record fixture costs apart from the base machine cost.
Power Consumption Costs
Power cost depends on voltage, amperage, weld time, duty cycle, and energy rate. For a rough estimate, calculate power in kilowatts and multiply it by operating hours.
Use this basic formula: power (kW) = volts × amps ÷ 1,000. Then use cost = power × time × energy rate.
Adjust the estimate if your machine has efficiency losses or if the duty cycle stays well below full load. Measured meter data gives the best result for repeat production.
| Parameter | Formula | Unit |
|---|---|---|
| Power | Volts × amps ÷ 1,000 | kW |
| Energy cost | Power × time × rate | $ |
| Efficiency factor | Adjusts effective power use | % |
Ancillary Equipment Expenses
Ancillary equipment can include cooling systems, fixtures, guards, cables, controls, quality tools, and electrode dressing tools. These items may look small, but they add up over a production run.
Group equipment costs into capital, operating, and replacement categories. Then decide whether each cost belongs to one job, one customer, or all shop work.
Annualize recurring items such as planned maintenance, repair parts, and fixture wear. For job-specific tooling, allocate the full cost to the expected part volume unless the customer pays separately.
- List every dedicated fixture and replacement part.
- Estimate service intervals before production starts.
- Track repair frequency by machine and job type.
- Review tooling cost after the first production run.
Adding Overhead, Waste Allowances, and Profit Margin
Overhead, waste, and profit turn direct cost into a real selling price. Don’t treat them as small extras at the end.
Use your accounting method to allocate utilities, rent, supervision, administration, insurance, and maintenance support. Some shops apply overhead as a percentage of labor, while others use a machine-hour rate.
Add a waste allowance for scrap, rework, trial welds, inspection samples, and yield loss. Base this number on your shop history and job risk.
Apply profit margin after you calculate the full estimated cost. Your margin should reflect order size, risk, customer terms, capacity, and market conditions.
Warning: Don’t apply profit before overhead and waste, because that can hide real cost and weaken your final margin.
Worked Example: Projection Welding Cost Per Part
Use a small sample model to see how the pieces fit together. Replace these sample numbers with your own shop data before using the method for a live quote.
| Cost Item | Sample Input | Cost Per Part |
|---|---|---|
| Base material and fastener | Actual part cost from supplier | $0.42 |
| Electrode wear and supplies | Electrode cost spread over expected weld life | $0.06 |
| Labor | 0.015 labor-hour × loaded labor rate | $0.90 |
| Machine and power | Machine-hour allocation plus energy cost | $0.18 |
| Inspection and rework allowance | Based on expected quality checks | $0.10 |
| Overhead allocation | Shop method applied to labor or machine time | $0.27 |
| Waste allowance | Applied to material and production risk | $0.08 |
| Estimated cost before profit | Total estimated cost | $2.01 |
If your target profit is 20% on cost, the selling price becomes $2.41 per part. Use this example only as a structure, because your real cost depends on part design, batch size, labor rate, energy price, and scrap rate.
Common Mistakes That Distort Projection Welding Costs
Many projection welding quotes fail because the model ignores small but repeatable losses. These gaps can reduce profit across every batch.
- Leaving setup time out of the per-part cost
- Using nameplate power instead of measured power
- Forgetting electrode dressing and replacement time
- Ignoring destructive test samples and startup scrap
- Applying overhead too late or too low
- Using old material prices for repeat quotes
Check these items before you send the final price. A short review can protect your margin and help you explain the quote clearly.
Frequently Asked Questions
How Do Projection Welds Affect Product Fatigue Life Long-Term?
Projection welds can reduce fatigue life if defects, poor fusion, or sharp stiffness changes create stress points. Proper projection design, weld schedules, and inspection help improve long-term joint durability.
Can Projection Welding Be Automated for Small Batch Runs?
Yes, you can automate projection welding for small batch runs when the fixture supports quick changeovers. Automation can improve repeatability, data logging, and weld consistency, but the tooling cost must fit the batch size.
How Do Environmental Rules Impact Welding Consumable Disposal?
Environmental rules can affect how you handle used electrodes, cleaning waste, coatings, and contaminated shop materials. Check local rules and keep records for waste separation, storage, hauling, and disposal.
What Quality Inspection Methods Are Best for Projection Welds?
Use visual checks for surface defects and dimensional issues. Add torque tests, pull tests, peel tests, ultrasonic testing, or metallographic checks when the part risk or customer standard requires stronger proof.
How Do Joint Geometry Variations Change Welding Parameters?
Joint geometry changes current, time, pressure, and projection design needs. Thicker sections often need more heat input, while complex shapes may need special fixtures to keep pressure even.
How Should You Price Small Projection Welding Batches?
Small batches often need a higher per-part price because setup, fixture, and inspection time spread across fewer parts. Price the setup as a separate line item or divide it clearly across the expected batch size.
What Input Changes Affect Projection Welding Cost the Most?
Labor time, scrap rate, material price, and batch size usually create the largest cost swings. Run a sensitivity check on those inputs before you commit to a fixed quote.
Conclusion
A good projection welding cost estimate turns each input into a clear per-weld or per-part value. Start with direct material, consumables, labor, machine time, and power, then add overhead, waste, and profit. Use real shop data whenever you can, and update the model after each job. When you keep the method consistent, your quotes become easier to defend and your margins become easier to protect.
