
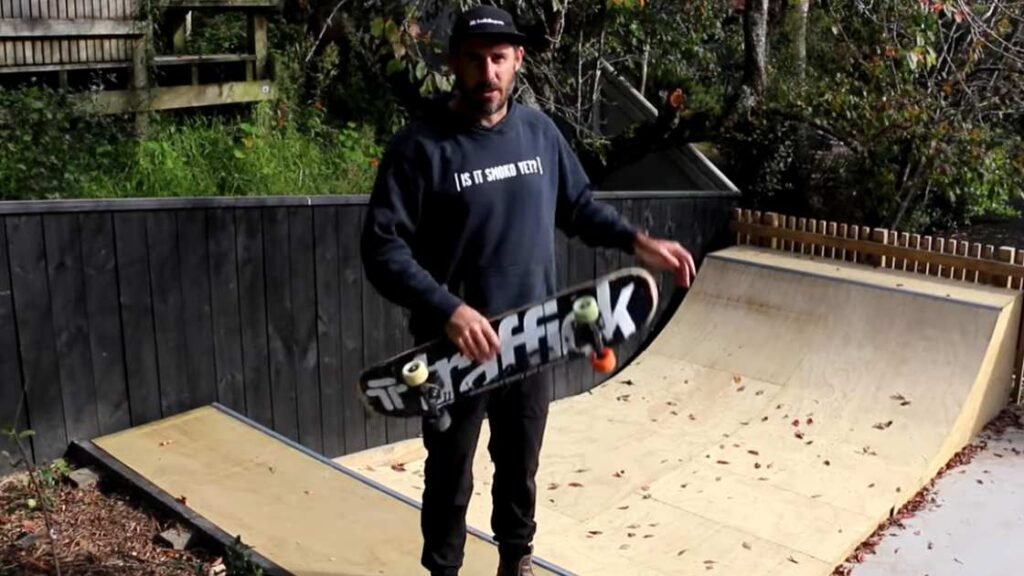
The cost to build a mini ramp is roughly $1,000 to $2,500 for a DIY wood build (an estimate, not a quote) and about $2,099 to $7,599 for a precut kit. A backyard mini ramp gives you a convenient place to practice, but the total can vary by thousands of dollars. Size, surface material, site preparation, tools, and whether you build from raw lumber or buy a precut kit make the biggest difference. The best estimate starts with a specific plan and a local materials quote.
Quick Answer
Plan on roughly $1,000–$2,500 for a typical DIY wood mini ramp before premium surfacing or paid labor. Current precut kits start near $2,099 and can exceed $7,500. A six-sheet pro surface alone adds about $870–$1,332 before shipping, so price your exact plan locally.
Key Takeaways
- Raw-lumber DIY builds usually cost less than kits, but they require more tools, cutting, planning, and build time.
- Current mini-halfpipe kits range from about $2,099 for a micro ramp to $7,599 for a larger 5′ × 12′ model.
- Skatelite and Gator Skins improve outdoor durability but can add $870–$1,776 for six to eight 4′ × 8′ panels.
- Site leveling, drainage, permits, HOA approval, delivery, taxes, tools, and maintenance can raise the final total.
At a Glance
| Time Required | About 4–6 hours for some precut 3′ × 8′ kits with helpers; several full days or weekends for a raw-lumber DIY build |
| Difficulty | Intermediate to advanced DIY carpentry; accurate layout, curved cuts, framing, and safe assembly are required |
| Tools Needed | Tape measure, square, chalk line, drill/driver, circular saw, jigsaw, clamps, bits, sander, and safety equipment |
| Cost | Working DIY budget: about $1,000–$2,500 before premium surfacing or paid labor; current kits: about $2,099–$7,599 |
Skateboarding fans often add mini ramps to their yards because they can practice without driving to a skatepark. A well-planned ramp can serve beginners, experienced riders, family members, and friends, but it needs enough space, sound framing, safe decks, and protection from weather.
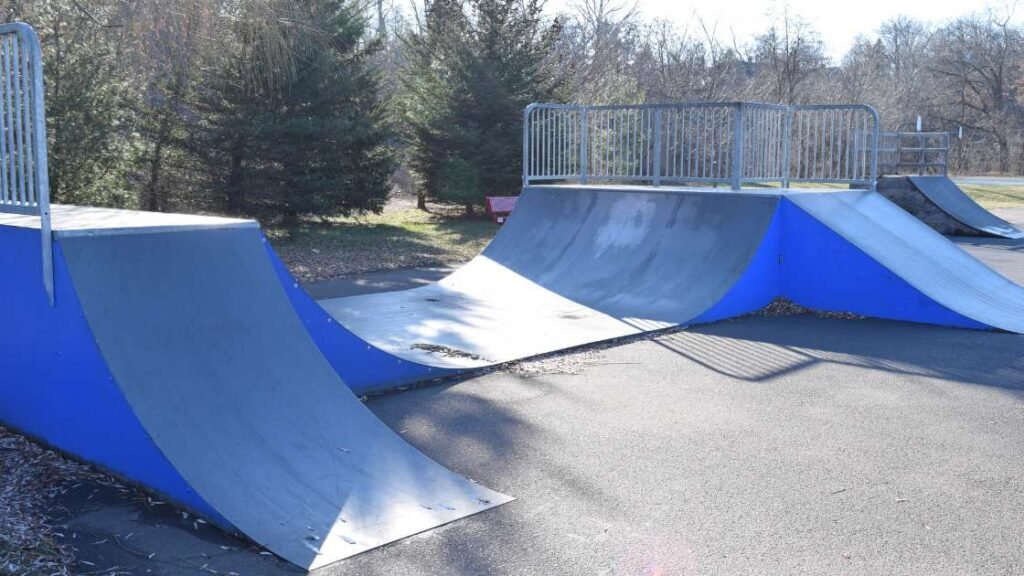
The Appeal of Mini Ramps
Mini ramps are compact compared with full-size vert ramps and work for many skill levels. Beginners can learn pumping, kick turns, and transition balance, while experienced skaters can practice lip tricks and maintain consistency.
Growing Skate Culture
A home ramp can become a regular meeting place for a local skate crew. It also makes short practice sessions possible when a public park is far away or crowded.
Personal vs. Community Use
Decide early whether the ramp will be mainly private or shared. That choice affects width, deck size, noise, supervision, wear, and insurance questions.
- Space: Confirm the full ramp footprint, deck clearance, safe run-off space, and access for materials.
- Cost: A private build is a solo expense; a shared build may spread costs but needs clear ownership and maintenance rules.
- Access: More riders increase wear and may create neighbor, noise, or liability concerns.
Cost to Build a Mini Ramp in 2026
There is no single national price because lumber, plywood, steel, delivery, taxes, and permit fees vary by location. Use the ranges below as planning allowances, then price the exact cut list for your chosen design.
| Build Type | Current Planning Range | What Changes the Price |
|---|---|---|
| Raw-lumber DIY mini ramp | About $1,000–$2,500 before premium surfacing or paid labor | Width, plywood grade, local lumber prices, coping, tools, footings, drainage, and finish |
| Precut mini-halfpipe kit | About $2,099–$7,599 in current vendor listings | Height, width, surface upgrade, back panels, extensions, shipping, tax, and installation |
| Premium riding surface | $870–$1,776 for six to eight panels before shipping | Panel brand, sheet count, freight, color, and local pickup availability |
| Professional installation | Quote required | Site access, leveling, anchoring, ramp size, travel, crew size, and local labor rates |
Note: The DIY figure is a working budget, not a national average. Build from an exact plan, price every item locally, and add tax, delivery, tool rentals, site work, and a contingency before committing.
Current Kit Price Examples
Vendor listings checked in October 2026 show how strongly size affects kit cost. Prices can change, and upgrades or shipping may add to the amount shown.
- Micro mini halfpipe: from about $2,099 (Keen Ramps); OC Ramps lists a 2-ft garage mini ramp kit at about $2,499.
- 2′ × 8′ to 3.5′ × 8′ mini halfpipe: from about $2,799 to $3,299.
- 3′ × 8′ mini halfpipe: about $3,199 at Keen Ramps; OC Ramps lists an 8-ft-wide Equation mini ramp at about $2,999.
- 3′ × 12′ to 3.5′ × 12′ mini halfpipe: about $4,549–$4,749 before upgrades.
- Larger 4′ × 12′ to 5′ × 12′ and 4′ × 16′ kits: about $5,199–$7,599.
Check current options directly on the OC Ramps halfpipe collection and the Keen Ramps mini-halfpipe collection.
Factors Influencing Mini Ramp Costs
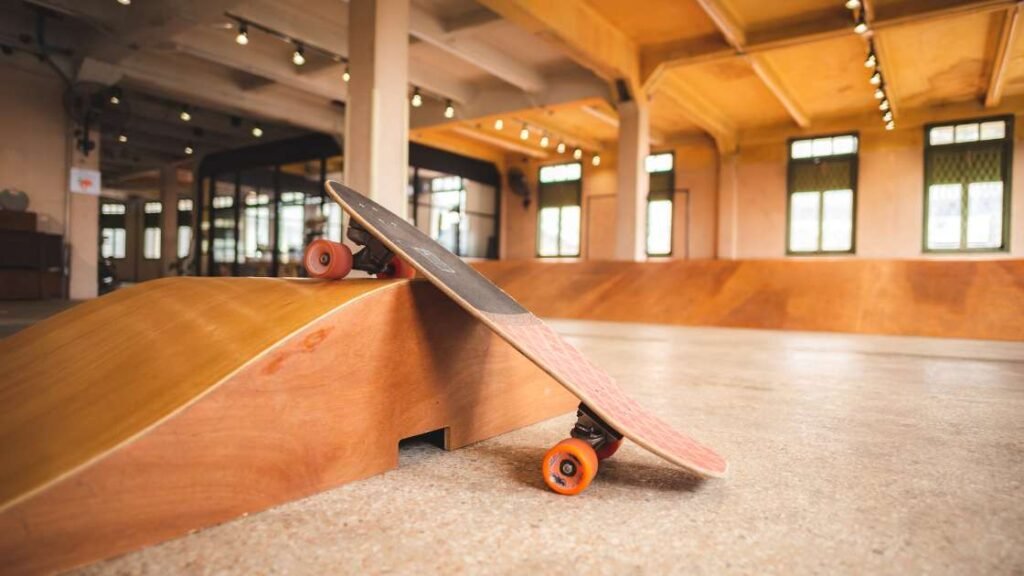
Wood quality, dimensions, surface choice, site conditions, and labor control most of the final bill.
Material Choices
- Exterior plywood: A lower-cost top layer, but it needs sealing, drainage, and regular inspection outdoors.
- Skatelite or Gator Skins: Purpose-made riding surfaces that cost more upfront and are designed for demanding ramp use.
- Framing lumber: Outdoor exposure may require treated or otherwise suitable lumber based on the plan and local conditions.
- Galvanized or protected hardware: Helps reduce corrosion in outdoor builds.
- Steel coping: Two-inch nominal steel pipe has an outside diameter of about 2⅜ inches; schedule 40 is lighter, while schedule 80 has a thicker wall.
Premium materials do not remove the need for drainage, ventilation, covered seams, and routine maintenance.
Size and Complexity
| Width | Wider ramps need longer framing members, more plywood, more coping, and more fasteners. |
|---|---|
| Height | Taller transitions use more structure and may need larger decks, railings, or additional engineering review. |
| Length and flat bottom | Longer flat sections increase the footprint and material count. |
| Features | Extensions, spines, roll-ins, enclosed backs, larger decks, lights, and railings add cost and complexity. |
Simple 8′-wide designs are normally cheaper than 12′- or 16′-wide ramps with added sections.
Labor and DIY Skill
- Professional builder: Higher cost, but the builder may provide design experience, a defined scope, insurance, and a workmanship warranty.
- Precut kit: Reduces measuring and cutting, but you still need a level site, helpers, safe lifting, and correct assembly.
- Raw-lumber DIY: Usually saves labor cost but demands accurate transition layout, cutting, framing, sheet bending, coping installation, and weatherproofing.
Ask professional builders for a written scope that states whether site preparation, delivery, permits, anchoring, surfacing, cleanup, and warranty coverage are included.
Material Costs Breakdown
Start with the material list from a proven plan. A published 3′-tall × 8′-wide DIY design uses 53 eight-foot 2×4s, four sheets of 3/4-inch plywood, ten sheets of 3/8-inch plywood, five top sheets, steel coping, screws, and bolts. See the complete DIYskate 3-foot mini-ramp plan before pricing materials.
Wood and Steel
- Structural side panels: Commonly cut from 3/4-inch plywood.
- Riding layers: Often two thinner structural layers with staggered seams, followed by a replaceable top surface.
- 2×4 framing: Quantity rises quickly with ramp width and length; the referenced 3′ × 8′ plan uses about 53 pieces.
- Steel coping: Usually 2-inch nominal steel pipe, which has an outside diameter near 2⅜ inches.
- Fasteners: Use the type, size, spacing, and corrosion resistance required by the plan and material manufacturer.
Weatherproof Surfaces
Purpose-made ramp surfaces raise the upfront price but may reduce swelling, splintering, and frequent top-sheet replacement when installed and maintained correctly.
- Skatelite Pro 4′ × 8′ panel: currently about $222 per sheet before delivery. See the current Skatelite listing.
- Gator Skins 4′ × 8′ all-weather panel: currently about $145 per sheet plus shipping and handling. See the manufacturer’s product page.
- 3′ × 8′ ramp example: One current kit specification calls for six premium-surface sheets.
At current panel prices, six pro-surface sheets add about $870–$1,332 before shipping; eight sheets add about $1,160–$1,776.
Tools and Hardware
| Tools | Hardware and Supplies |
|---|---|
| Circular saw, jigsaw, drill/driver, sander, clamps | Exterior-rated screws, bolts, nuts, washers, and approved anchors |
| Tape measure, chalk line, square, straightedge | Steel coping, threshold plate if specified, sealant, paint, and flashing materials |
| Optional miter saw, shop vacuum, and tool rentals | Concrete blocks, compacted stone, or footings when required by the site and plan |
Plywood and lumber prices vary by store and region. Build a line-item cart from the plan instead of multiplying a rough price per square foot.
Site Preparation, Space, and Permits
A cheap ramp on a poor foundation can become expensive. Before buying materials, measure the yard and check drainage, setbacks, utilities, noise, and access.
Measure the Full Footprint
Include the transition sections, flat bottom, decks, stairs or access points, and safe clearance around the ramp. An “8-foot-wide ramp” still needs a much longer rectangular area once you add the transitions, flat bottom, and decks.
Choose a Stable Base
A level concrete pad is convenient. On soil, the plan may call for compacted stone, blocks, pads, or footings. Keep wood away from standing water and provide airflow beneath the structure.
Check Local Rules
Building, zoning, setback, noise, fence, and accessory-structure rules vary by city and county. HOA approval is separate from a government permit, so check both before ordering a kit or scheduling delivery.
Warning: Contact 811 or your state 811 center a few business days before any digging. Wait for required utility responses and markings before installing footings, anchors, drainage, or electrical service.
Labor Costs Explained

Building your own ramp can be rewarding, but labor includes much more than fastening boards together. Layout, material handling, repeated measuring, curved cuts, sheet bending, coping fit, leveling, sealing, cleanup, and inspection all take time.
Professional Builders vs. DIY
- Professional builder: Get at least two itemized quotes and verify experience with skate ramps or similar curved outdoor structures.
- DIY approach: Count tool purchases, rentals, helpers, delivery, mistakes, damaged sheets, and your own time.
- Kit assembly: Some precut 3′ × 8′ kits advertise a 4–6 hour assembly estimate and require only a drill, but that estimate assumes a prepared site and capable helpers.
Time Investment
- Choose and review the complete plan before buying materials.
- Prepare and level the site before the build day.
- Allow time for cutting, framing, sheathing, coping, finishing, and curing.
- Schedule extra time for weather delays and corrections.
Safety and Liability
A contractor’s insurance does not automatically remove a homeowner’s responsibility for conditions or injuries on the property. Discuss the project with your insurer, control access, supervise children, post sensible rules, and inspect the ramp before use.
| Aspect | Professional Builder | DIY |
|---|---|---|
| Insurance | Ask for proof of current liability and workers’ compensation coverage where applicable. | The homeowner accepts construction risk and should check home-insurance requirements. |
| Quality control | Define plans, materials, fasteners, finish, inspection, and warranty in writing. | Follow a proven plan and inspect every joint, seam, edge, and fastener. |
| Ongoing liability | The owner still controls access and maintenance after handoff. | The owner controls construction, access, maintenance, and repairs. |
Additional Expenses
Wood and screws are only part of the budget. Include the following items before comparing DIY and kit totals.
Permits and Legalities
- Building or zoning permit fees, when required
- HOA application or design-review fees
- Property survey or setback verification
- Noise, lighting, fence, and operating-hour restrictions
Delivery and Site Access
- Freight or local delivery charges
- Curbside unloading help
- Moving long lumber, steel, and sheet goods into the yard
- Removal of fences or temporary access changes
Maintenance and Upkeep
- Wood protection: Recoat exposed wood and seal vulnerable edges as needed.
- Surface repairs: Replace cracked or swollen sheets and tighten loose hardware.
- Drainage: Remove leaves and debris and prevent water from collecting under the ramp.
- Metal care: Watch for rust, sharp edges, loose coping, and raised fasteners.
Accessories and Extras
| Accessory | Use | Planning Allowance |
|---|---|---|
| Skate paint or exterior coating | Adds grip and protects compatible plywood surfaces | About $30–$150, depending on product and coverage |
| Railings or deck barriers | Fall protection where required by the design or local code | Quote from the plan and local supplier |
| Lighting | Improves visibility but may trigger electrical, glare, or operating-hour rules | About $20–$200 for simple portable lighting; more for permanent electrical work |
| Protective gear | Helmet, knee pads, elbow pads, and wrist guards | Price separately for every regular rider |
Cost-Saving Tips
Save money by simplifying the design and planning carefully, not by weakening the structure or using damaged materials.
Use a Proven, Material-Efficient Plan
A detailed cut list reduces waste and prevents last-minute purchases. Do not change width, transition radius, framing spacing, or sheet thickness without understanding how the change affects the structure and ride.
Compare Local Suppliers
- Price the full lumber and plywood list at more than one store.
- Ask steel suppliers to quote coping cut to the required length.
- Compare freight charges with local pickup for premium surfaces.
- Rent specialty tools instead of buying tools you will use once.
Reclaimed Materials
- Use reclaimed material only when its grade, condition, straightness, thickness, and outdoor suitability are known.
- Reject warped, split, delaminated, water-damaged, rotten, or heavily corroded pieces.
Community Volunteers
Organize a build day with capable friends, but assign one person to check measurements, fastener placement, and safety. Extra helpers do not replace a sound plan.
Phased Building
- Build the basic structure and a suitable plywood surface first.
- Protect it from water and maintain it.
- Add premium panels, extensions, lighting, or other upgrades later.
Pro Tip: Before checkout, create a one-page budget with quantities, unit prices, tax, delivery, tool costs, site work, and a 10%–15% cushion. This exposes missing items before the build starts.
Real-World Mini Ramp Budgets
Use examples to understand scale, but do not copy an old total without repricing every material.
Case Studies
- DIY 3′ × 8′ plan: The referenced plan uses about 53 eight-foot 2×4s plus multiple plywood layers, coping, screws, and bolts.
- Current 3′ × 8′ kit: About $3,199 at Keen Ramps before optional surface upgrades, taxes, or delivery costs.
- Current 3′ × 12′ to 3.5′ × 12′ kits: Roughly $4,549–$4,749 before options.
Budget Worksheet
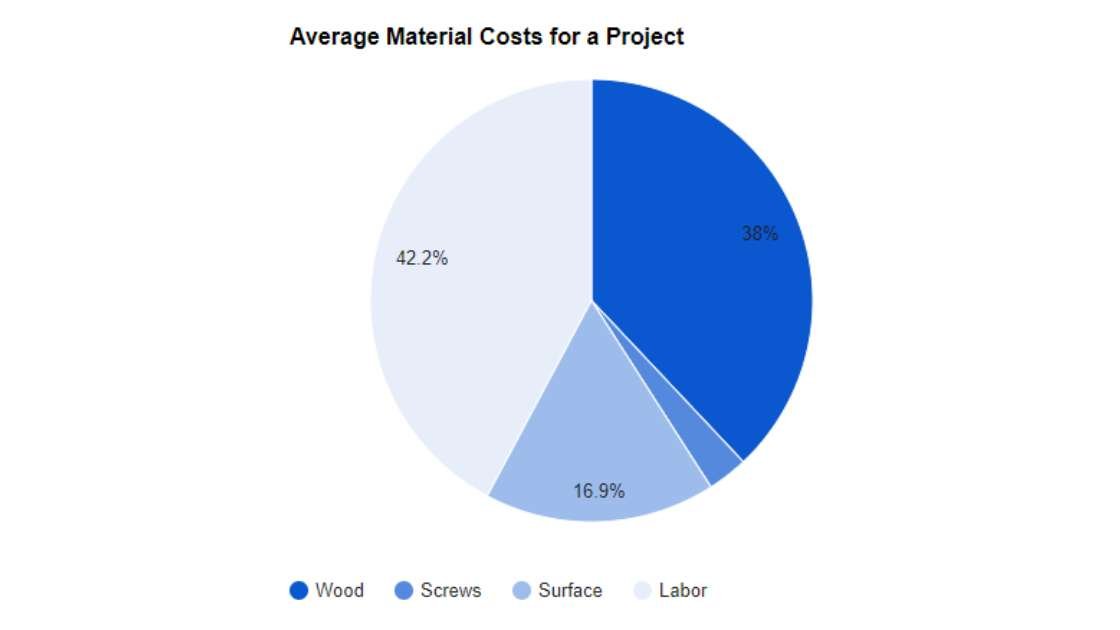
The chart is illustrative. Use the worksheet below for a current project-specific total.
| Budget Line | How to Calculate It | Commonly Missed Cost |
|---|---|---|
| Framing lumber | Plan quantity × local unit price | Waste, treated-lumber premium, delivery |
| Structural plywood | Sheet count × grade/thickness price | Damaged sheets, cut waste, edge sealing |
| Top surface | Plywood/coating total or premium panel count × price | Freight and replacement fasteners |
| Coping and hardware | Steel quote + screws + bolts + anchors | Cutting, drilling, corrosion-resistant upgrades |
| Site preparation | Leveling + base + drainage + footings | Excavation, stone delivery, disposal |
| Tools and labor | Purchases/rentals + contractor quotes | Helpers, travel, cleanup, repairs |
| Approvals and utilities | Permit + HOA + electrical work if used | Plan review, inspections, trenching |
| Contingency | Add 10%–15% after the subtotal | Price changes, mistakes, extra hardware |
Value Over Time
- Convenience: More practice sessions without travel.
- Skill growth: Repetition on a familiar transition.
- Community: A gathering place when access and supervision are managed responsibly.
- Resale limits: A custom ramp may not add home value and can cost money to move or remove.
How to Estimate Your Mini Ramp Cost
- Choose the exact dimensions. Record height, width, flat-bottom length, deck depth, transition radius, and total footprint.
- Select a proven plan or kit. Confirm the full bill of materials and whether the design is intended for outdoor use.
- Price the structure locally. Add lumber, plywood, coping, fasteners, anchors, base materials, and delivery.
- Choose the top surface. Compare sealed plywood with purpose-made panels and include sheet count plus freight.
- Add tools and labor. Include rentals, blades, bits, safety equipment, helpers, or professional installation.
- Add property costs. Include permits, HOA review, drainage, electrical work, fencing, or insurance changes.
- Add a contingency. A 10%–15% cushion can cover small mistakes and price changes.
- Compare the final DIY total with kits. Include your time and the value of precut parts, instructions, and delivery.
Pre-Ride Safety and Maintenance Checklist
Inspect the ramp before the first session and after storms, long storage, repairs, or heavy use.
- Confirm the ramp is level, stable, and properly connected or anchored.
- Check that coping is secure and has no sharp burrs or movement.
- Run a hand and visual check for raised screw heads, splinters, gaps, buckled sheets, and sharp edges.
- Remove water, leaves, grit, stones, and other debris from the riding surface.
- Keep decks clear and provide safe access.
- Wear a properly fitted helmet and appropriate pads. The U.S. Consumer Product Safety Commission recommends safety gear and a smooth riding surface away from traffic.
- Do not ride a wet, icy, damaged, or poorly lit ramp.
Frequently Asked Questions
How do you make a homemade mini ramp?
Start with a proven plan. Prepare a level base, cut matching transition sides, frame the transitions and flat bottom, connect and level the sections, install staggered plywood layers, fit the coping, add the top surface, protect exposed wood, and inspect every fastener and edge before riding.
How much does it cost to build a halfpipe?
A practical working budget for a typical backyard DIY mini halfpipe is about $1,000–$2,500 before premium surfacing or paid labor. Current precut kits start near $2,099 and can exceed $7,500. Larger, taller, professionally installed, or premium-surfaced ramps cost more.
What is a good height for a mini ramp?
Many backyard mini ramps are about 3–4 feet tall. A lower 2–3 foot ramp may feel less intimidating, while a 4–5 foot ramp is faster and takes more space, structure, and skill. Transition radius and deck design matter as much as height.
How many 2×4s do I need for a mini ramp?
The exact count depends on dimensions and framing spacing. One published 3′-tall × 8′-wide plan uses 53 eight-foot 2×4s. A wider ramp can need many more, so follow the material list for the exact plan rather than scaling the count by guesswork.
Do I need a permit for a backyard mini ramp?
Possibly. Requirements vary by city and county and may depend on height, footprint, anchoring, decks, electrical work, setbacks, or classification as an accessory structure. Check the local building and zoning departments and obtain separate HOA approval when applicable.
Can a wooden mini ramp stay outside?
Yes, but outdoor life depends on suitable materials, sealed edges, drainage, airflow, covered seams, corrosion-resistant hardware, and routine maintenance. Do not let water pool on or beneath the ramp, and replace swollen, soft, delaminated, or cracked panels promptly.
How long does a mini ramp take to build?
Some precut 3′ × 8′ kits advertise about 4–6 hours of assembly on a prepared site with helpers. A raw-lumber DIY ramp commonly takes several full days or weekends because you must lay out transitions, cut parts, frame, sheath, fit coping, finish, and inspect the structure.
Is it cheaper to build or buy a mini ramp?
Raw-lumber DIY is usually cheaper when you already own the tools and can build accurately. A kit costs more but saves layout and cutting time and may include precut, predrilled parts and instructions. Compare complete totals, including delivery, tools, site work, surface upgrades, and your time.
Related Cost Guides
- Cost to build a 12×16 shed for another backyard DIY structure budget
- Cost to build a pickleball court if you want a different backyard sports project
- Cost to build a basketball gym for a larger indoor sports build
Conclusion
A typical backyard mini ramp can fit a low-four-figure DIY budget, while current kits range from about $2,099 to more than $7,500. The most reliable number comes from a specific plan, a current local material cart, and a complete allowance for surface panels, delivery, tools, site preparation, approvals, maintenance, and safety. Build for drainage and durability, inspect the ramp often, and never trade structural quality for a lower price.
Sources
- OC Ramps Halfpipe Collection — current kit sizes and listed starting prices.
- Keen Ramps Mini Half Pipes — current mini-halfpipe range and starting prices.
- Keen Ramps Skatelite Pro 4′ × 8′ Sheet — current panel price and outdoor-use description.
- Gator Skins Product Information — current 4′ × 8′ all-weather panel price and warranty information.
- 811 Before You Dig — official steps to request utility markings before excavation.
- U.S. Consumer Product Safety Commission: Skate Safely — protective gear and safe-surface guidance.

4 thoughts on “How Much Does It Cost to Build a Mini Ramp? (DIY vs Kit Prices)”
Pingback: How Much Does It Cost To Build A Gas Station? Professional Tips
Pingback: How Much Does It Cost To Build A Hotel | Unlocking The Secrets: The 7-Step Guide To Building Your Dream Hotel
Pingback: How Much Does It Cost To Straight Pipe A Truck?
Pingback: How Much Does It Cost To Build A High School Basketball Gym?